💻 Week 10 Lab
Using Git as a team

📍Location: Friday, 6 December 2024. Time varies.
🥅 Learning Objectives
Today we’ll focus on three key skills essential for your group project:
- Team Formation: Form your project groups and establish communication channels
- Git Collaboration: Learn to work on shared code using branches and pull requests
📋 Preparation
- If you already have a group of three from the same class, you can already follow Part 1 – even before Friday’s class.
🛣️ Roadmap
Part 1: Form Your Groups (20 min)
Your class teacher will point out that this first half-hour is for you to form your groups. If you’re not in a group, you can ask your teacher for help.
🎯 ACTION POINTS:
Form your group
- Ideal size: 3 members
- Need help finding a group? Ask your class teacher
- Some groups may have 4 members (requires teacher approval)
⚠️ Missing this class? You’ll be randomly assigned to a group by Jon later.
Pick a creative name for your team
- The name will be part of your GitHub repository URL
- Make it unique and professional
- Be creative! Don’t use generic names like “Group 1” or “Team A”
Not in a group? ✋🏻 Raise your hand and ask your class teacher for help.
Find the GitHub assignment link:
👥 Together Go to the Moodle version of this page to grab the link, accept the assignment and create a team repository. We don’t share the link publicly. It is a private repository for enrolled students only.
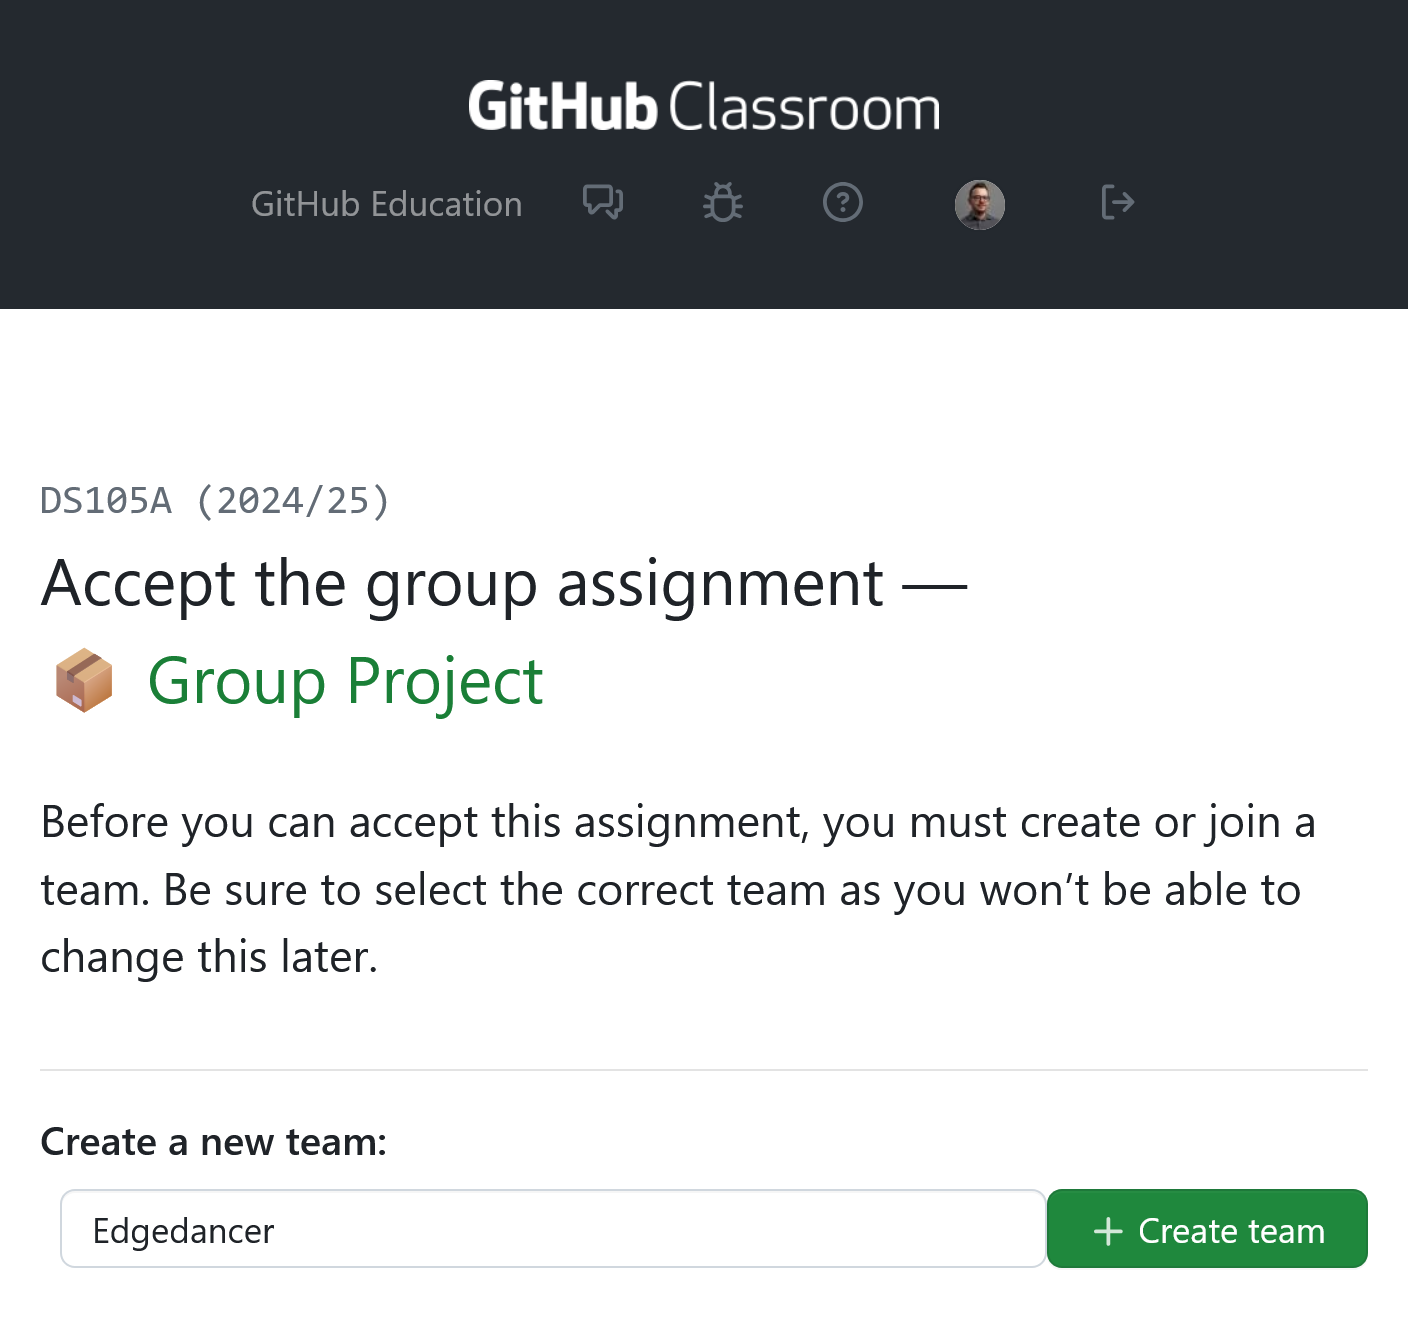
The first person to click the link will create a team name:

Figure 1. Add a creative team name if you are the first in your group then click + Create team The other team members should use the same team name when they join.
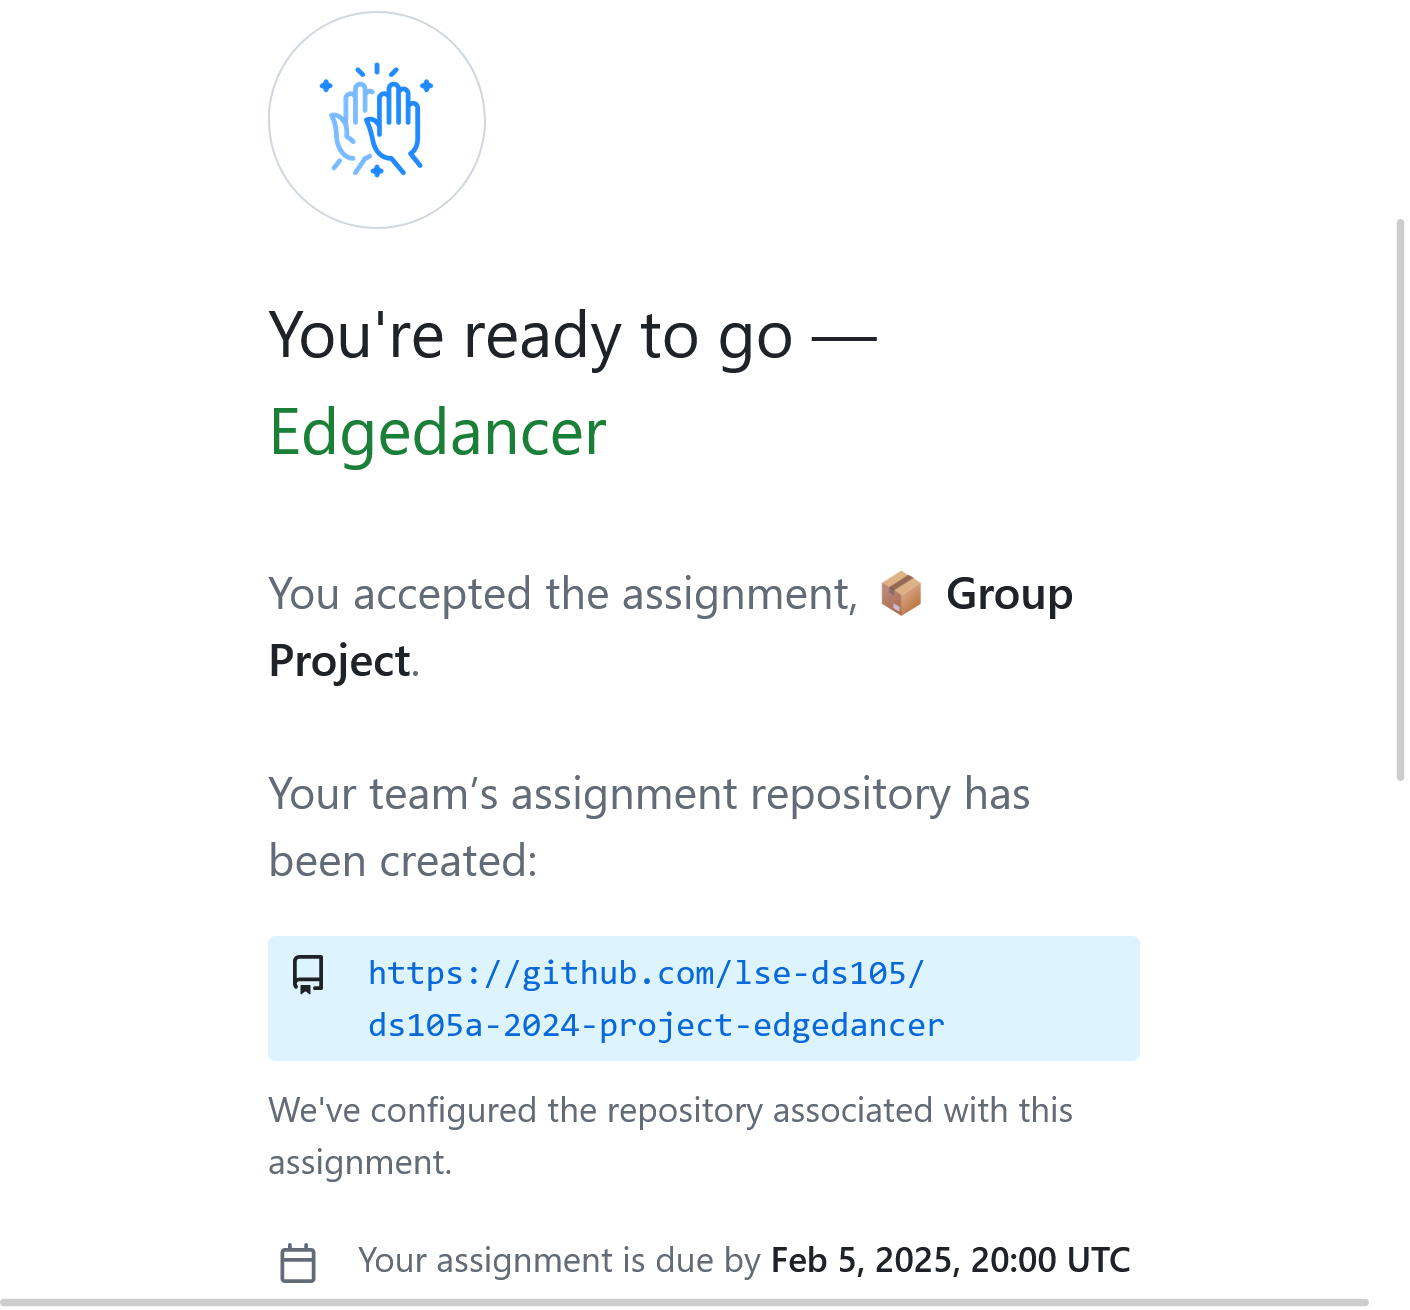
A few clicks later, you’ll see the repository URL:

Figure 2. You will see the dedicated repository for your team. And that’s it!

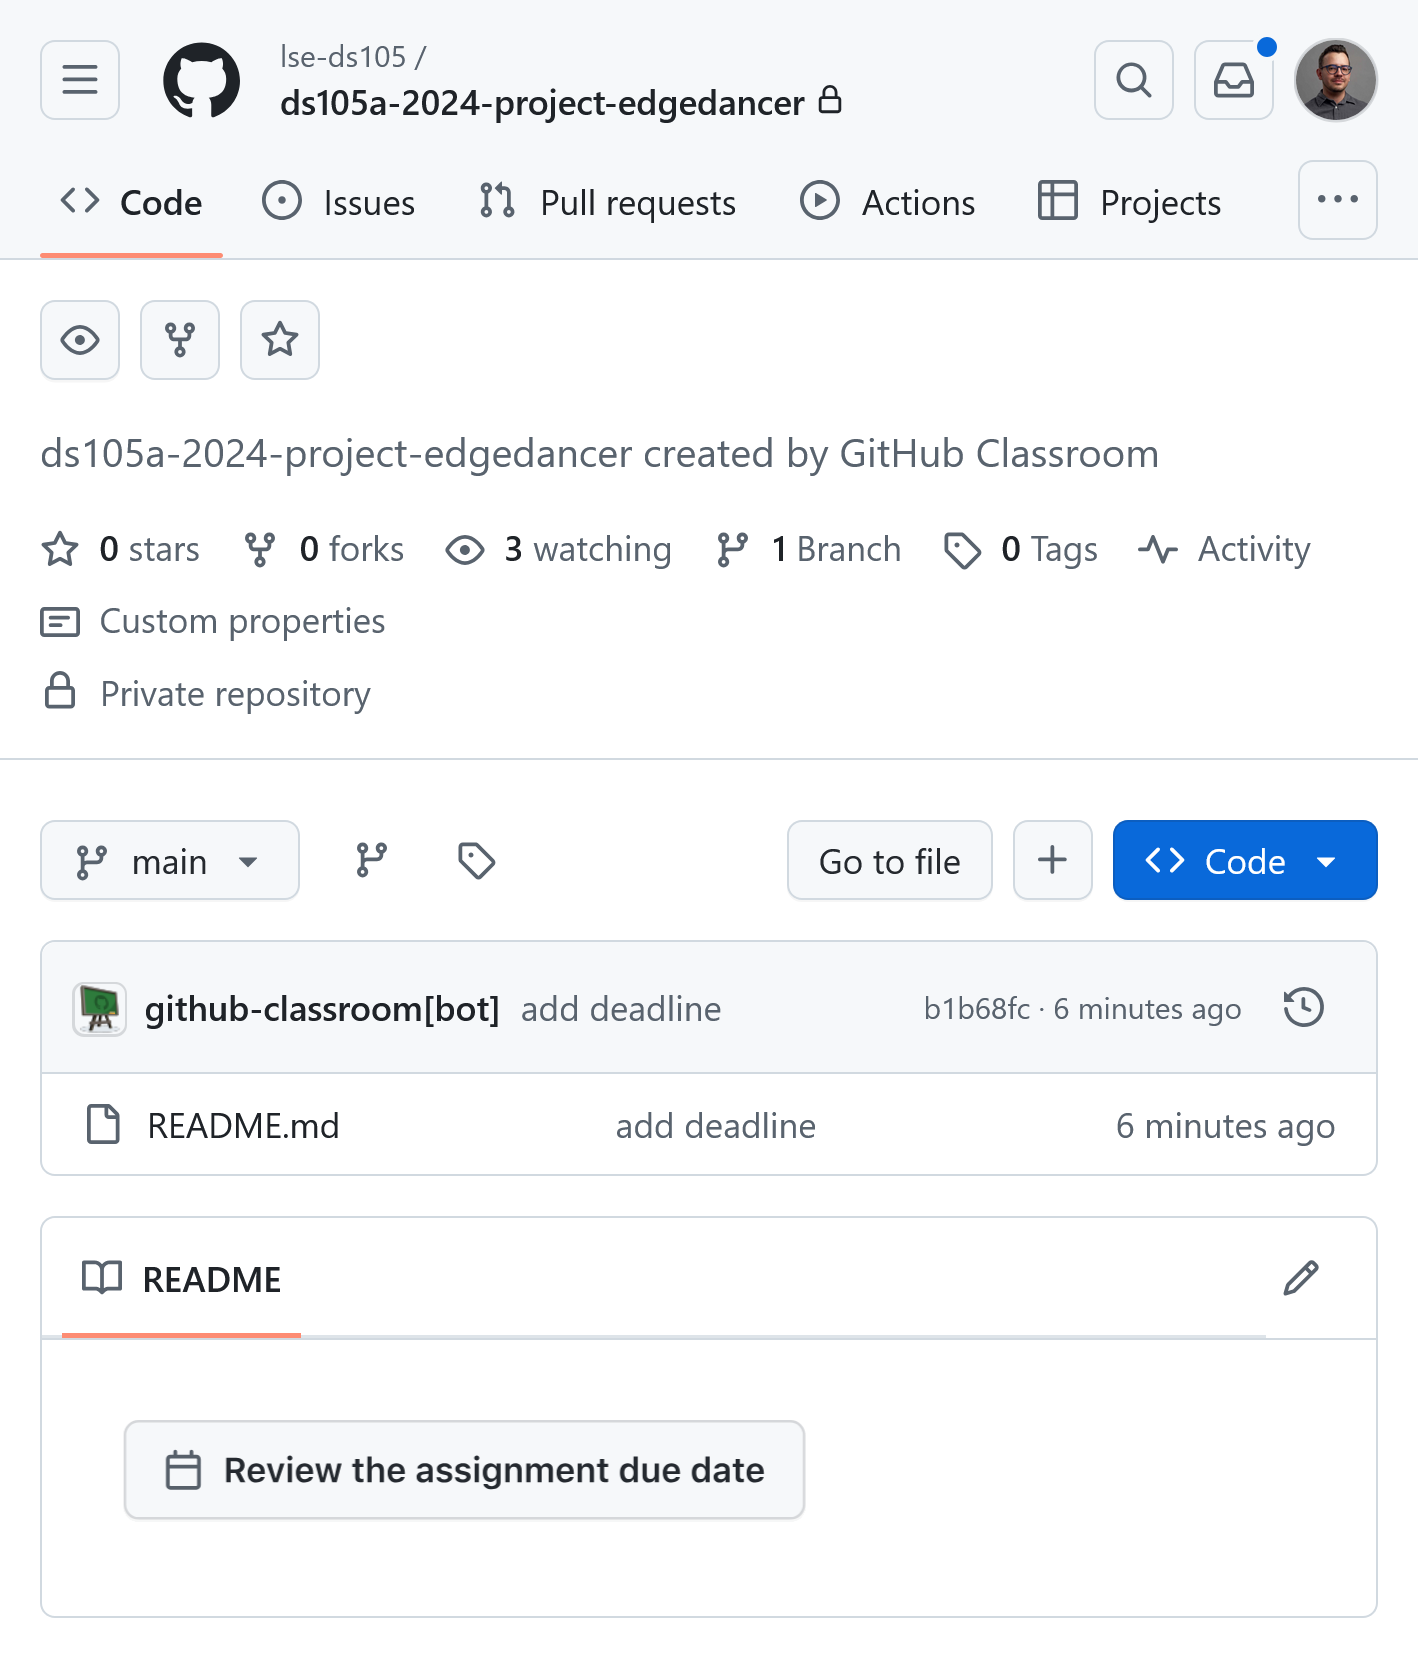
Figure 3. Your repository will be completely empty, apart from a (mostly empty) README file. Everyone should now clone the repository locally:
git clone <repository-url>
cd <repository-name>
Replace
<repository-url>with the SSH URL you copied from GitHub.
💡 Coming up next: We’ll learn how to create a branch and make our first pull request!
Part 2: Working Together with Git Branches (30 min)
👨🏻🏫 TEACHING MOMENT
Your class teacher will demonstrate how teams can work safely on code using Git branches, using one of your group’s repositories as an example.
The Class Teacher’s Demo
Pay close attention to them as they show you how to:
Create a branch
git checkout -b add-team-info💡 Important Note: In this course, branches should serve a single purpose. This is reflected on the name,
add-team-info– this is the only ‘feature’ we’re adding to the repository.Modify a file on that branch
## Meet the Team

#TODO: add our names here

- Person A
- Person B
- Person C
Then, commit and push to that branch. (Notice that the main branch is left untouched.)
View branch history
git log --oneline --graph --all
💡 Visualizing Git Branches
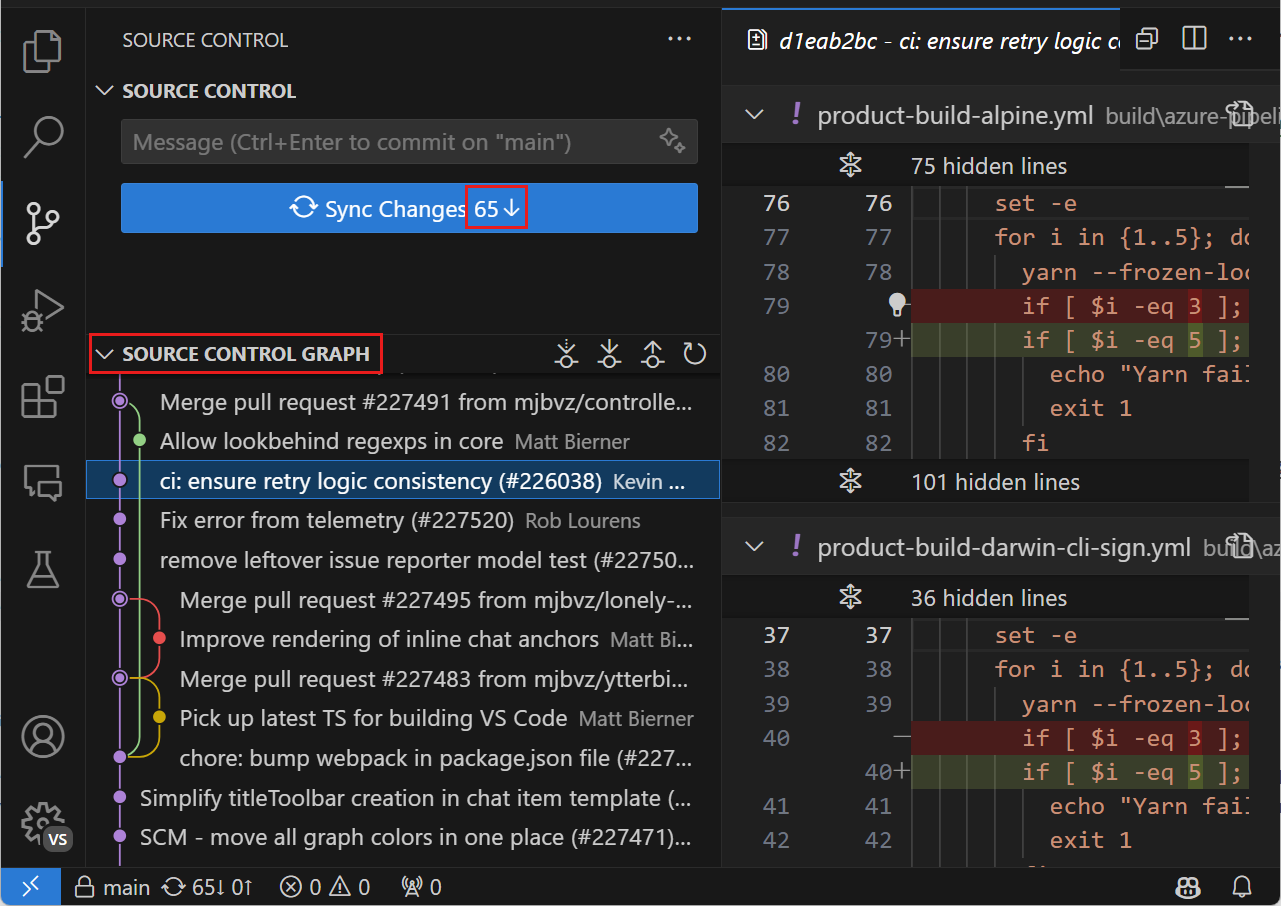
💡 Seeing Git in Action
Track your team’s work using:
- GitHub’s ‘Insights’ > ‘Network’ tab for branch history
- VS Code’s Source Control panel for local changes (not available on Nuvolos)

⚠️ Note: This is just the beginning! Teams often develop more sophisticated workflows, like Gitflow, as projects grow.
Create a pull request
💡 Pro-tip: Pull requests let your team review and discuss changes before they become final.
Merge the changes
The group who volunteered their repository will all ‘accept’ the changes and the teacher will merge the branch.
Do not go past this point until the teacher has finished the demo.
Part 3: Managing Your First Conflict (40 min)
Now that you’ve seen how branches work, let’s create a safe space to experience your first merge conflict.
The Challenge
Working in your teams of three, you’ll each make changes to different sections of the README, each on a separate branch. When you try to merge them, you’ll encounter a conflict.
Person A - Team Description (10 min)
git checkout -b <your-username>-add-team-descriptionAdd this section to your README:
## About Our Team
We are students passionate about [your interests]...
Person B - Project Ideas (in parallel with Person A)
git checkout -b <your-username>-add-team-descriptionAdd this section to your README:
## Project Ideas
Here are some topics we're excited to explore...
Person C - Meeting Times (also in parallel)
git checkout -b add-meeting-timesAdd this section to your README:
## Team Schedule
We plan to meet on [days/times]...
💡 Note: This activity works best if you all start from the same point (the main branch) and work simultaneously.
Creating the Conflict
Now comes the fun part! Create pull requests for each branch and try to merge them one after another. The second or third merge will show a conflict.
⚠️ Don’t panic! When Git shows a conflict, it’s just asking for help deciding which changes to keep.
Resolving Together
There will be a 👨🏻🏫 TEACHING MOMENT here!
Your class teacher will until a couple of groups have conflicts (they might wait to see if you can resolve them on your own). They’ll then demonstrate to the entire class how to resolve the conflict in one of the repositories.
- Understand the conflict markers (
<<<<<<<,=======,>>>>>>>) - Decide which changes to keep
- Create a final commit that resolves the conflict
💡 Learning Insight
Merge conflicts aren’t mistakes - they’re a natural part of collaborative work. Think of them as opportunities to discuss and combine everyone’s contributions thoughtfully.
Finished Early?
Think about next week’s pitch presentation… (it’s worth 10% of final grade)
🗣️ Next Week: Project Pitch
You are to present your project idea to the class on the very last day of Autumn Term!
Keep it short (3-5 minutes) but make it count!
We don’t want to see data! All I want you to present is: - What data you’re planning to use (there’s a guide for this, check the ‘Choosing a Data Source’ page) - What kind of questions you’re hoping to answer - How you’ll divide the work among your team. Truly, the key to success in this presentation is to show that you can work well together as a team (or at least you can pretend really well!)
NOTE: your ideas can (and probably will) evolve completely by 5 February 2025 8pm (the project deadline)
Presentation Format
Your presentation MUST be a GitHub Page: you are to present your pitch as a GitHub Page. Use what you learned today to make it engaging and accessible.
DO NOT ADD A LOT OF TEXT: remember, you’re presenting this live. The page should be a visual aid to your presentation, not a script.
👉🏻 Check out the Choosing Your Data Source guide
The W10 Lecture covered GitHub Pages setup - might be worth reviewing those notes while you’re waiting for others to finish!
Project requirements
A detailed marking criteria will be provided later, but for now, here’s a rough outline of what you’ll need to do.
The size and scope of the final project is similar to the W10 Summative, with a few tweaks. The project should involve:
- Getting interesting data from somewhere (this time you choose from where)
- Organising it nicely (e.g. files? databases?)
- A healthy dose of data cleaning and wrangling with pandas
- A description of the question(s) you want to pose to the data
- Cool visualizations to tell your story (this time, you can use any plotting library you like, not just
lets-plot!) - 🆕 GitHub evidence of how you worked together as a group (e.g.: GitHub Issues, branches, Pull Requests, project board)
- 🆕 A GitHub Page to tell about your findings
