
📝 Week 02 Practice Exercise
Python Foundations & File Management
This exercise builds on Week 01’s data exploration by introducing the Python fundamentals you need for data analysis. Complete before Thursday’s lecture.
⌚ Time estimate: 90 minutes
Desired output:
At the end of this exercise, you should have created a folder structure like this inside your Nuvolos workspace:
/files/
├── week01/ (left unchanged from Week 01)
└── week02/
    └── W02-NB01-Dataquest-lessons.ipynb
The notebook should contain your personal learning summaries from four DataQuest lessons, formatted with Markdown headings and your own reflections on how these concepts connect to data analysis.
Understanding the diagram above
File paths tell your computer exactly where to find something. Think of them like postal addresses for your files.
When you create a folder called week02/ inside your workspace, any file you put in that folder gets a “path” that includes the folder name. On a Nuvolos, the notebook called W02-NB01-Dataquest-lessons.ipynb inside the week02/ folder has the path:
/files/week02/W02-NB01-Dataquest-lessons.ipynbAnd this is because all of your files on Nuvolos are stored on the top folder called files/.
🎯 ACTION POINTS
Part 1: File Organisation & Template Setup (15 minutes)
Create your Week 02 workspace. Open
 VS Code in Nuvolos and create a new folder called
 week02/in your files directory.Once you’ve opened
VS Code, take a look at the left panel of the interface click on the  (New Folder icon) and type in the name of the folder you want to create:
 week02.You should see both the
week01andweek02folders next to each other: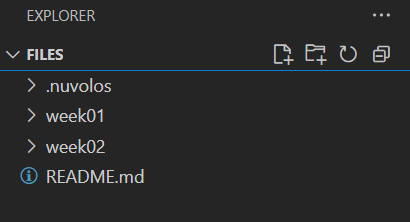
Figure 1. The VS Code app opened on Nuvolos showing the files in the week01andweek02folders on the same level.💡 Tip: You can also create folders by right-clicking somewhere empty in the file explorer and selecting “New Folder”.
Download the template notebook. Save this file to your computer’s Downloads folder:
Upload the template to Nuvolos. In VS Code’s file explorer (left panel), right-click on your
week02/folder and select “Upload”. Choose the template notebook you just downloaded.Open and personalise the notebook. Click on the uploaded notebook to open it. Add your name and candidate number in the header cells.
Part 2: Python Foundations & Documentation (60 minutes)
🎯 ACTION POINTS
Register for a LSE licence for DataQuest. Go to the Python for Data Science Pre-sessional Course on Moodle and carefully follow the instructions on the Getting Access and using DataQuest section there.
Although you could get into Dataquest with a free acount, you will only have a trial period. The LSE licence is what will allow you to complete all of the lessons.
Complete these four DataQuest lessons. Once you have access to DataQuest, complete these four lessons:
Looking ahead: Pay special attention to how dictionaries work. A key-value structure (weather_info["temperature"]) mirrors how you accessed DataFrame columns in 💻 W01 Lab (df['max_temp_c']). This pattern will be essential for Week 03 when you work with API data.
Document your learning as you go. For each lesson, write a summary under the corresponding section heading in your notebook. Your documentation should include:
- Section headers: Use Markdown heading syntax (
##,###) to organise each lesson - Key concepts: What were the most important ideas? Use bold or italic for emphasis
- Personal notes: What confused you? What clicked? What examples helped?
- Code examples: Include working code snippets using proper code block formatting.
This documentation practice mirrors how professional data scientists maintain research notebooks.
- Section headers: Use Markdown heading syntax (
Complete the final reflection. At the bottom of your notebook, answer this question in the final section:
“How do you think these these Python fundamentals connect to the data analysis you experienced in Week 01 (📝 W01 Practice, 🖥️ W01 Lecture or 💻 W01 Lab)?”
If your answer is closer to “I don’t know yet”, what’s your best guess about how variables, data types, and lists might be useful for working with datasets?
Working pace: Take your time with the DataQuest lessons. They build on each other, so understanding each concept properly will make the next lesson easier. If something doesn’t make sense, try the examples again or make notes about what’s confusing you.
Engage! 🗣️ 💬
As you work through the Python lessons, feel free to share observations or questions in the #help channel on Slack.
The teaching team monitors Slack regularly and other students often have helpful perspectives.
💭 Here’s something to think about: How is learning Python in DataQuest different from working with data in the Jupyter notebooks you used in Week 01? What are the advantages of each approach?