💻 Lab 03 – GitHub and Markdown
Week 01 – Day 03 - Lab Roadmap (90 min)
📋 LAB DIFFICULTY: 😅 NOT TOO CRAZY
(The tasks themselves might not be that challenging but there are a lot of steps)
🥅 Objectives
GitHub setup: Set up your GitHub account, ensuring you are ready to use GitHub for future projects.
Project repository: Create a private repository for your work in this course, including the creation of a README file.
Git Commands: Understand essential Git commands such as cloning a repository, uploading and downloading changes using
git pushandgit pull, and utilizing.gitignoreto exclude sensitive information from your repository.
📚 Recommended Reading
(for after the lab/for revision)
- 📘 Online book: Getting Started with Git (Chacon 2014, chaps. 1–2)
- 📃 GitHub Cheatsheet (GitHub 2022)
📋 Lab Tasks
The main goal of this lab is to gain practical experience with the GitHub platform and learn how to effectively use Git for version control. We encourage you to use GitHub to store your code and, in the future, beyond this course, to collaborate with others. It might take a bit of time to get used to it, but we promise it will be worth it.
This lab roadmap covers a lot of ground, and it’s common for many people not to complete all the steps during the lab. If you find yourself in that situation, don’t worry! You can continue working on it after the lab. Alternatively, we have set aside some time in tomorrow’s lecture to help you catch up.
Part 1: Welcome to GitHub (10 min)
The first thing we will do is explore GitHub. GitHub is a collaborative tool for developers with an estimated number of users of 100+ million. It allows developers to track changes in their code and collaborate straightforwardly and sustainably.
When applying to jobs related to data science, you will most likely be asked about your Git/GitHub skills. It is because they are crucial for data science teams.
Let’s get started!
🎯 ACTION POINTS
Register on GitHub if you haven’t done so yet.
We recommend you use a personal email address. This way, you still have access to your account if your university decides to delete your email account.
Choose a meaningful username and a password. We also recommend changing the default avatar picture. If you don’t feel comfortable using your real picture, use an avatar or anything else that you feel comfortable with.
Part 2: Your GitHub profile repository (20 min)
🎯 ACTION POINTS
Now, let’s create your first git repository. We will start with a personal README repository, this special repository acts as a kinda of professional profile page.
Click on the green button ‘New’ and create a new repository and name it EXACTLY as your GitHub username.
Now, on the newly created repository, add a README.md file. Including a README file for each repository is a good practice, even for personal profiles. READMEs are typically written in Markdown language, which allows for easy formatting and organization of information.
Customize your README file.
You can always edit your README file later.
Part 3: Create a repository for your files (~10 min)
Now, let’s create a repository where you will store all the files related to this course.
🧑🏻🏫 TEACHING MOMENT
Your instructor will follow the same steps below to create a personal repository for the course.
Create a new repository from scratch. Call it
lse-2023-me204.- On ‘Description’ write something like ‘My code for the LSE ME204 course’
- ☑️ Check the box to ‘Add README file’
- 🔻 On the ‘Add .gitignore’ dropdown menu, find and select ‘R’.
Using the web interface, modify the
README.mdfile to add a brief description of this course.Again using the web interface, create a new file called
lab03.Rand add the following code to it:print("I have created my first repository!") print("My name on GitHub is set to:") system("git config user.name") print("My e-mail on GitHub is set to:") system("git config user.email")
Part 4: Setup your computer to work with GitHub (50 min)
⚠️ Brace yourself, things are about to get complicated! ⚠️
Great! You have created a repository but now you need to set up your computer to be able to upload and download files from it.
If it helps, think of Git/GitHub as a Google Drive/Dropbox, only you are the one manually syncing the files.
🎯 ACTION POINTS
The first thing you need to do is to ensure you have
gitinstalled on your computer! If you don’t have it, you can download it here.Before you can download (clone) your project’s repository, you will need to set up your GitHub account on your computer.
- Open the terminal and type the following, replacing
your_usernamewith your GitHub username.
git config --global user.name "your_username"- Now type the following, replacing
your_emailwith your GitHub email address:
git config --global user.email "your_email"- Open the terminal and type the following, replacing
You will also need to set up an SSH key to work with GitHub from your computer.
Follow the instructions in the official documentation carefully, to generate a new SSH key
Now add your SSH key to your GitHub account. Follow the instructions here.
Test that it works by typing
ssh -T git@github.comon the prompt. You should see a message like this:Hi your_username! You've successfully authenticated, but GitHub does not provide shell access.
Now, navigate to a folder where you want to store your project.
- We recommend you create a folder called
Workspacein your local home/Documents folder, thencd ~/Workspace.
- We recommend you create a folder called
Clone your project’s repository.
- Go to your project’s repository page on GitHub and click on the green
Codebutton. - Copy the URL that appears under SSH
- Now, on the prompt, type
git cloneand paste the URL you copied. - Press
Enterand wait for the process to finish.
If you get an error message, it’s probably because you haven’t set up your SSH key correctly. Go back to step 3 and try again.
- Go to your project’s repository page on GitHub and click on the green
Check that your project’s folder has been created.
- Navigate to the folder you have just cloned.
- Check that the files you added to the repository (README.md and .gitignore) are there.
On your computer, create a folder called
labsinside your project’s folder.- Move your
lab01.R,lab01-tidyverse.Randlab02.Rfiles to this folder. - You can create subfolders for each lab, if you want.
- Move your
On the terminal, type
git status. You should see a message like this:On branch main Your branch is up to date with 'origin/main'. Untracked files: (use "git add <file>..." to include in what will be committed) labs/ nothing added to commit but untracked files present (use "git add" to track)This means that you have created new files, but you haven’t added it to the commit yet.
Now, you need to add your changes. Simply type:
git add labs/You can also use
git add *to add all the changes to the commit.Good. But adding files to the commit is not enough. You also need to commit them. Type:
git commit -m "message"Replace “message” with text that describes what you did in that repo. For instance, you could write “Added my lab files to the project”.
You have committed the changes, but they are still on your computer. You need to push them to the GitHub repository. Type:
git push
If you were able to complete all of that during the lab, you’re a hero! Keep using this workflow for the rest of the course, and you’ll become familiar with it in no time.
In tomorrow’s lecture, we have allocated some time to address any issues you might have with this process. So if you encounter any challenges, don’t worry, we’ll help you sort them out.
🏡 Bonus Task
There is a way to avoid having to type all of these commands manually. You can use Git inside RStudio!
- Open RStudio and create a new project.
- Select ‘Version Control’ and then ‘Git’.
- Paste the URL of your project’s repository.
- Select a folder where you want to store your project.
- Click ‘Create Project’.
- You should see your project’s files on the bottom right panel.
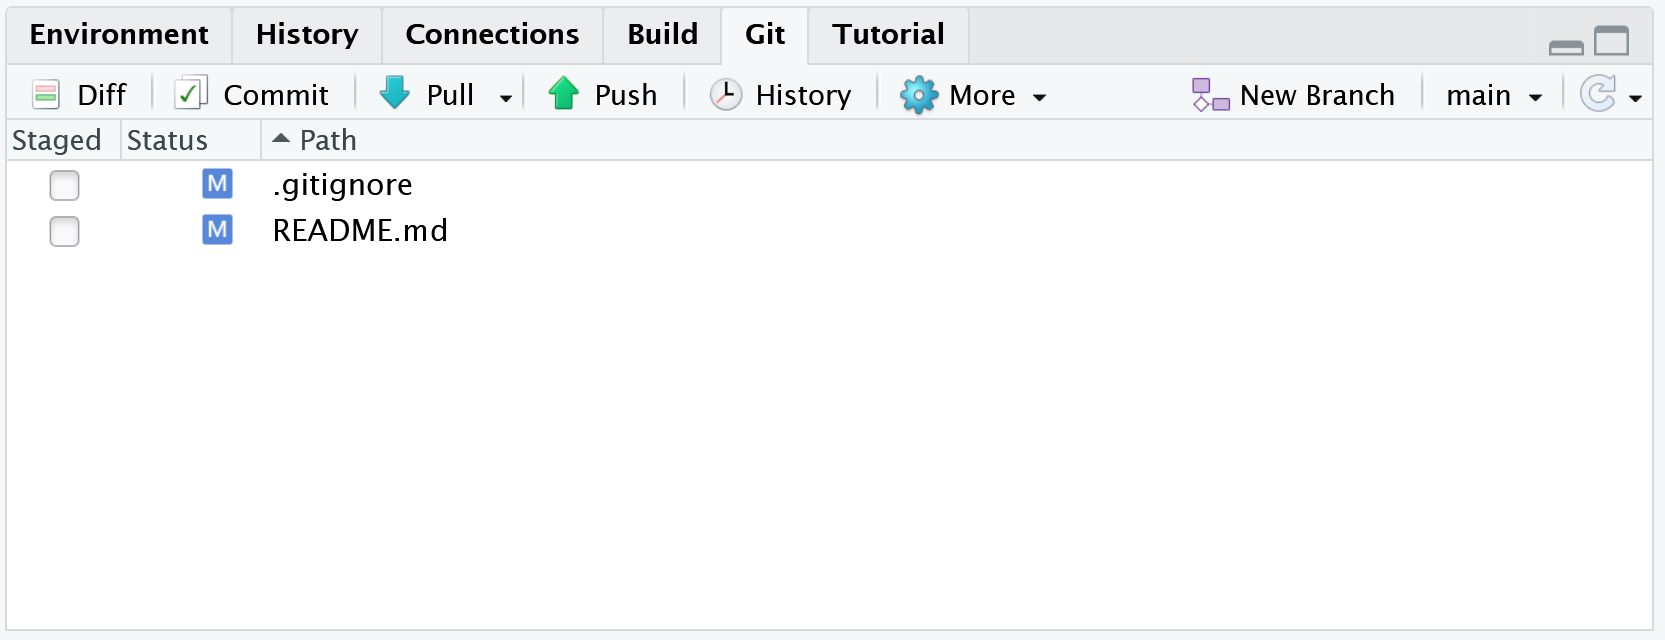
Now, whenever you make changes to your files, you can use the Git tab to add, commit and push them to GitHub: