Week 11
Software Engineering, AI Tools, and Final Projects
DS205 – Advanced Data Manipulation
30 Mar 2026
The Pull Request cycle (Part 1)
1 Create an Issue
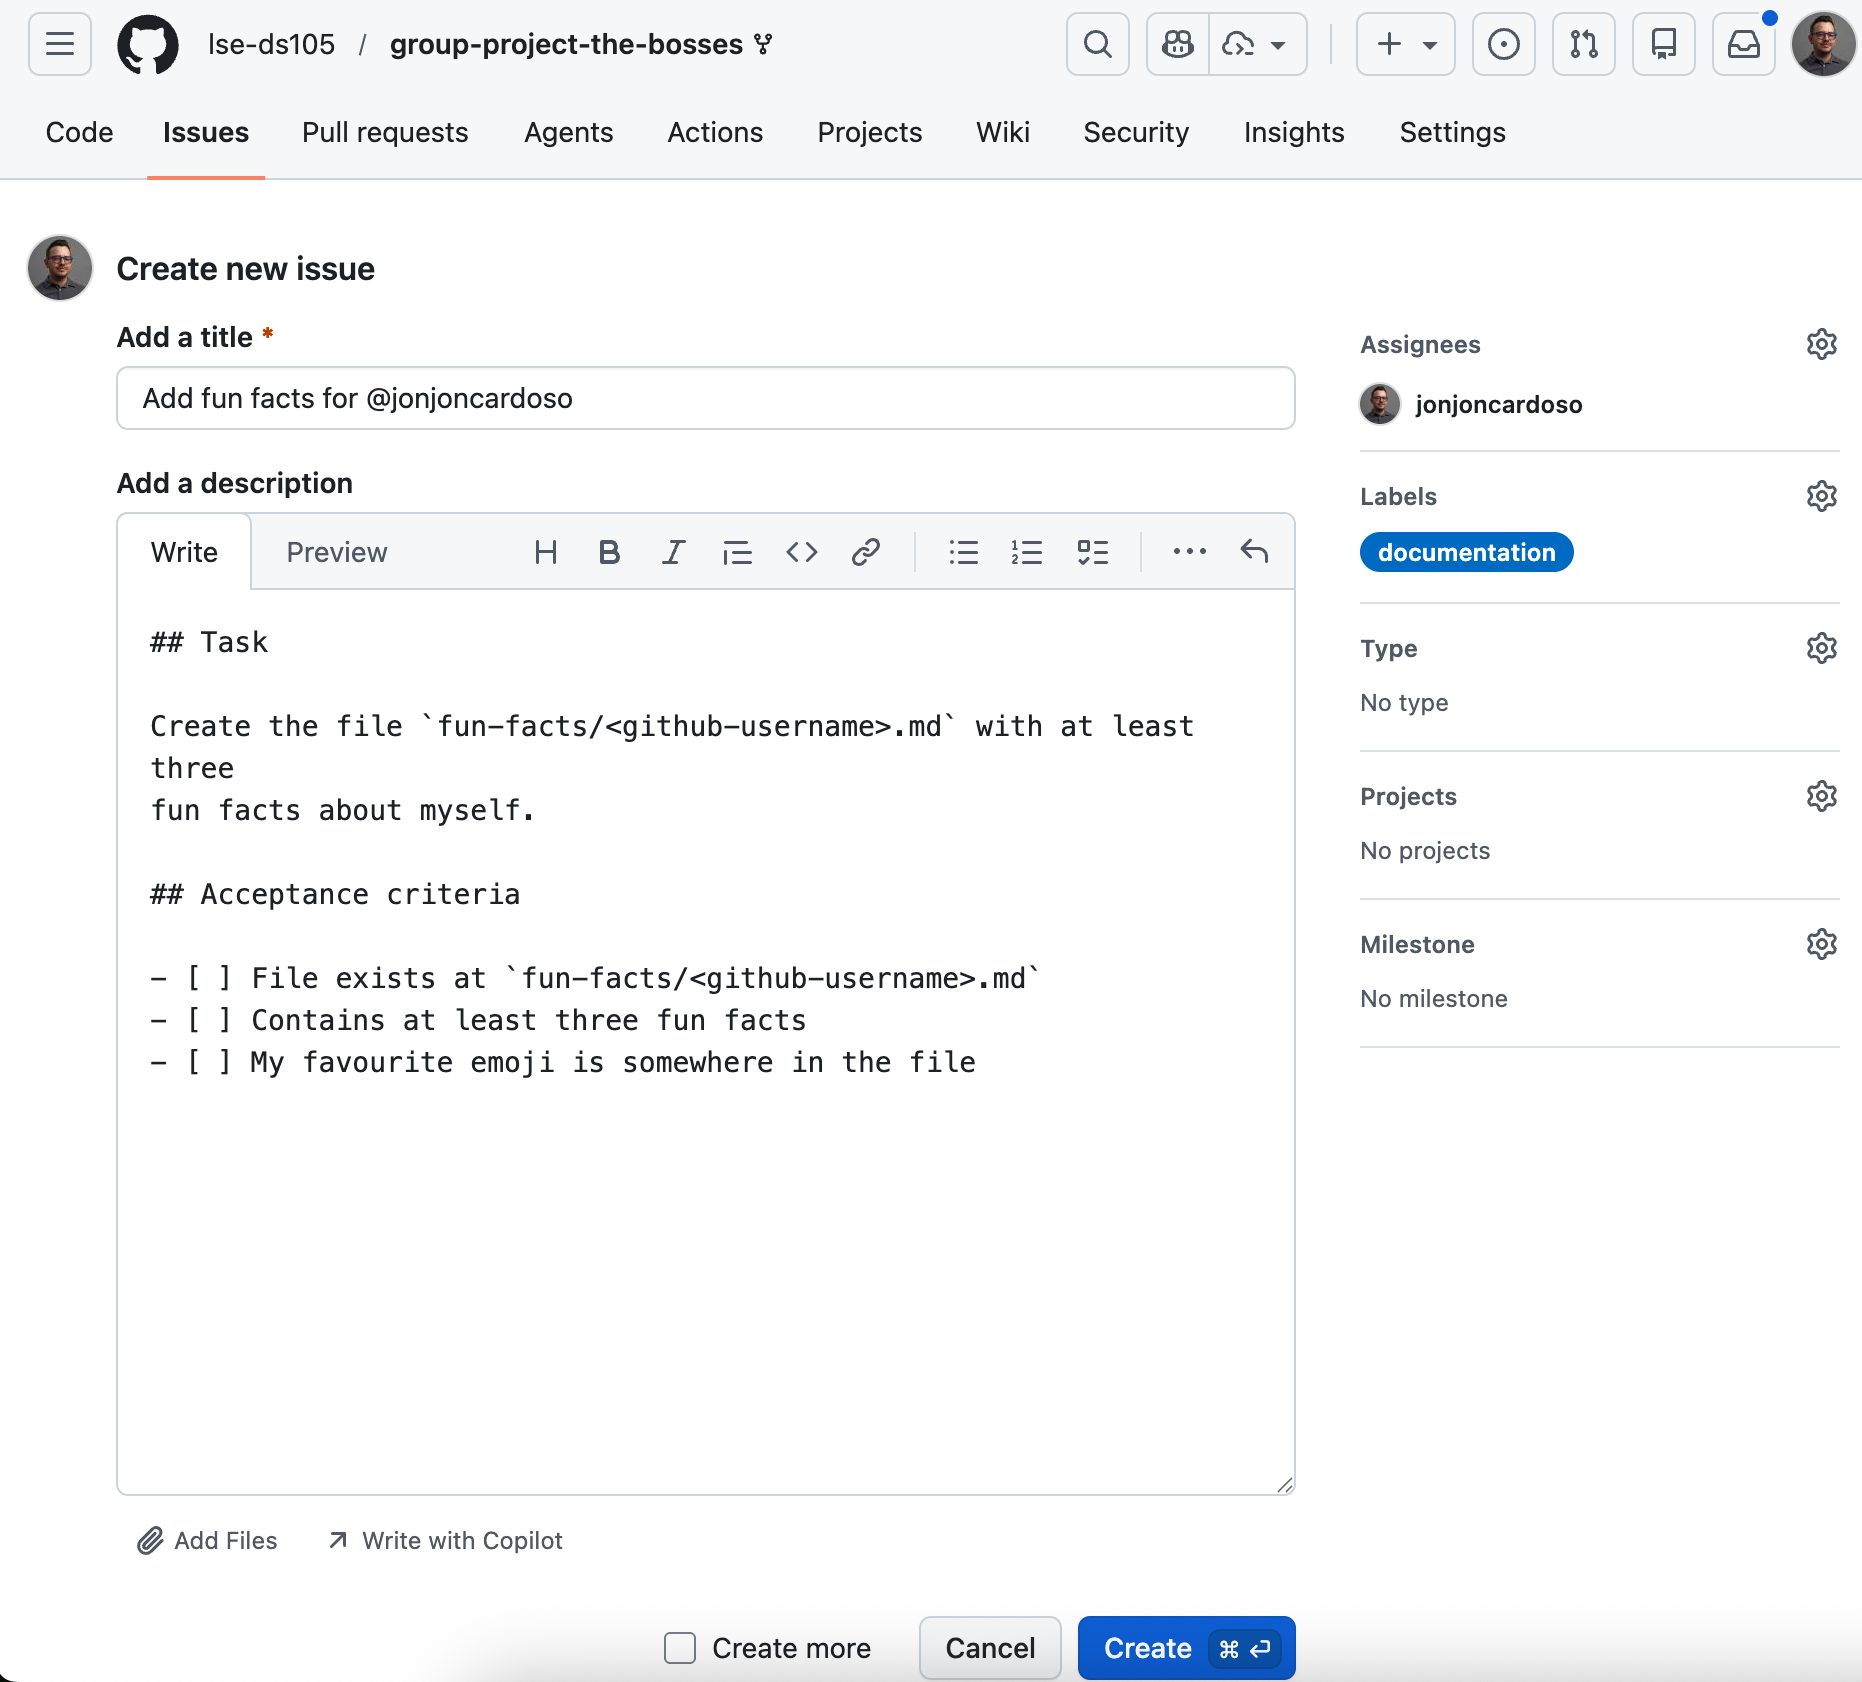
2 Branch from the Issue

3 Work on the branch. Commit as you go and push so teammates can see progress. (No screenshot: this is your editor and terminal.)
The Pull Request cycle (Part 2)
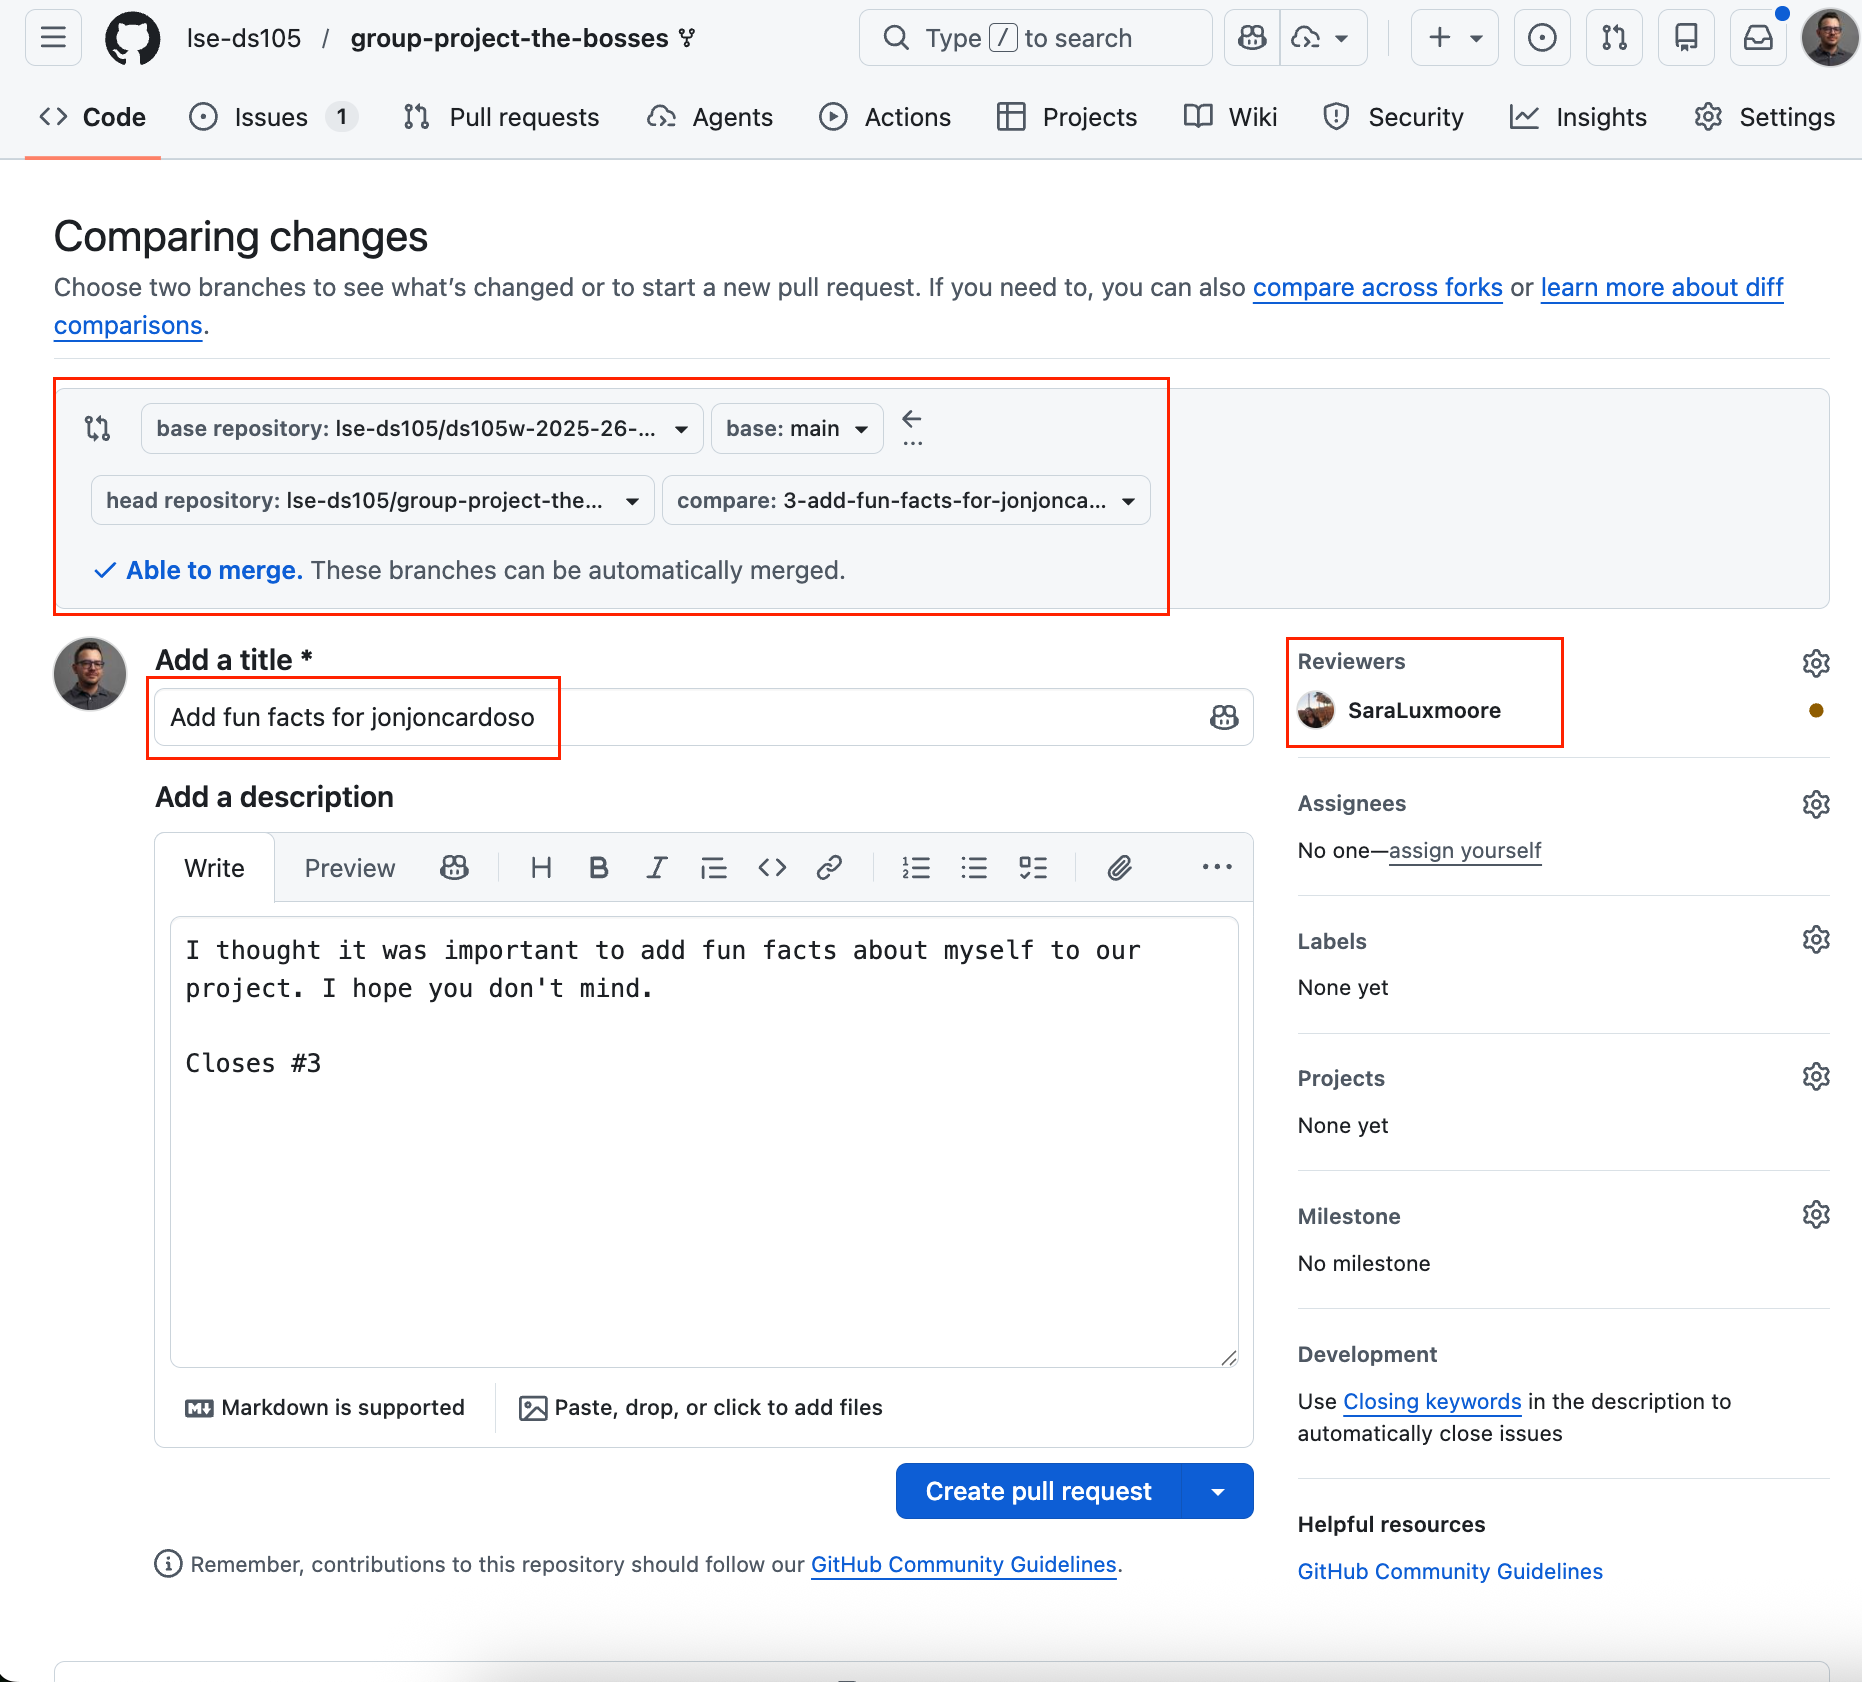
4 Open a Pull Request
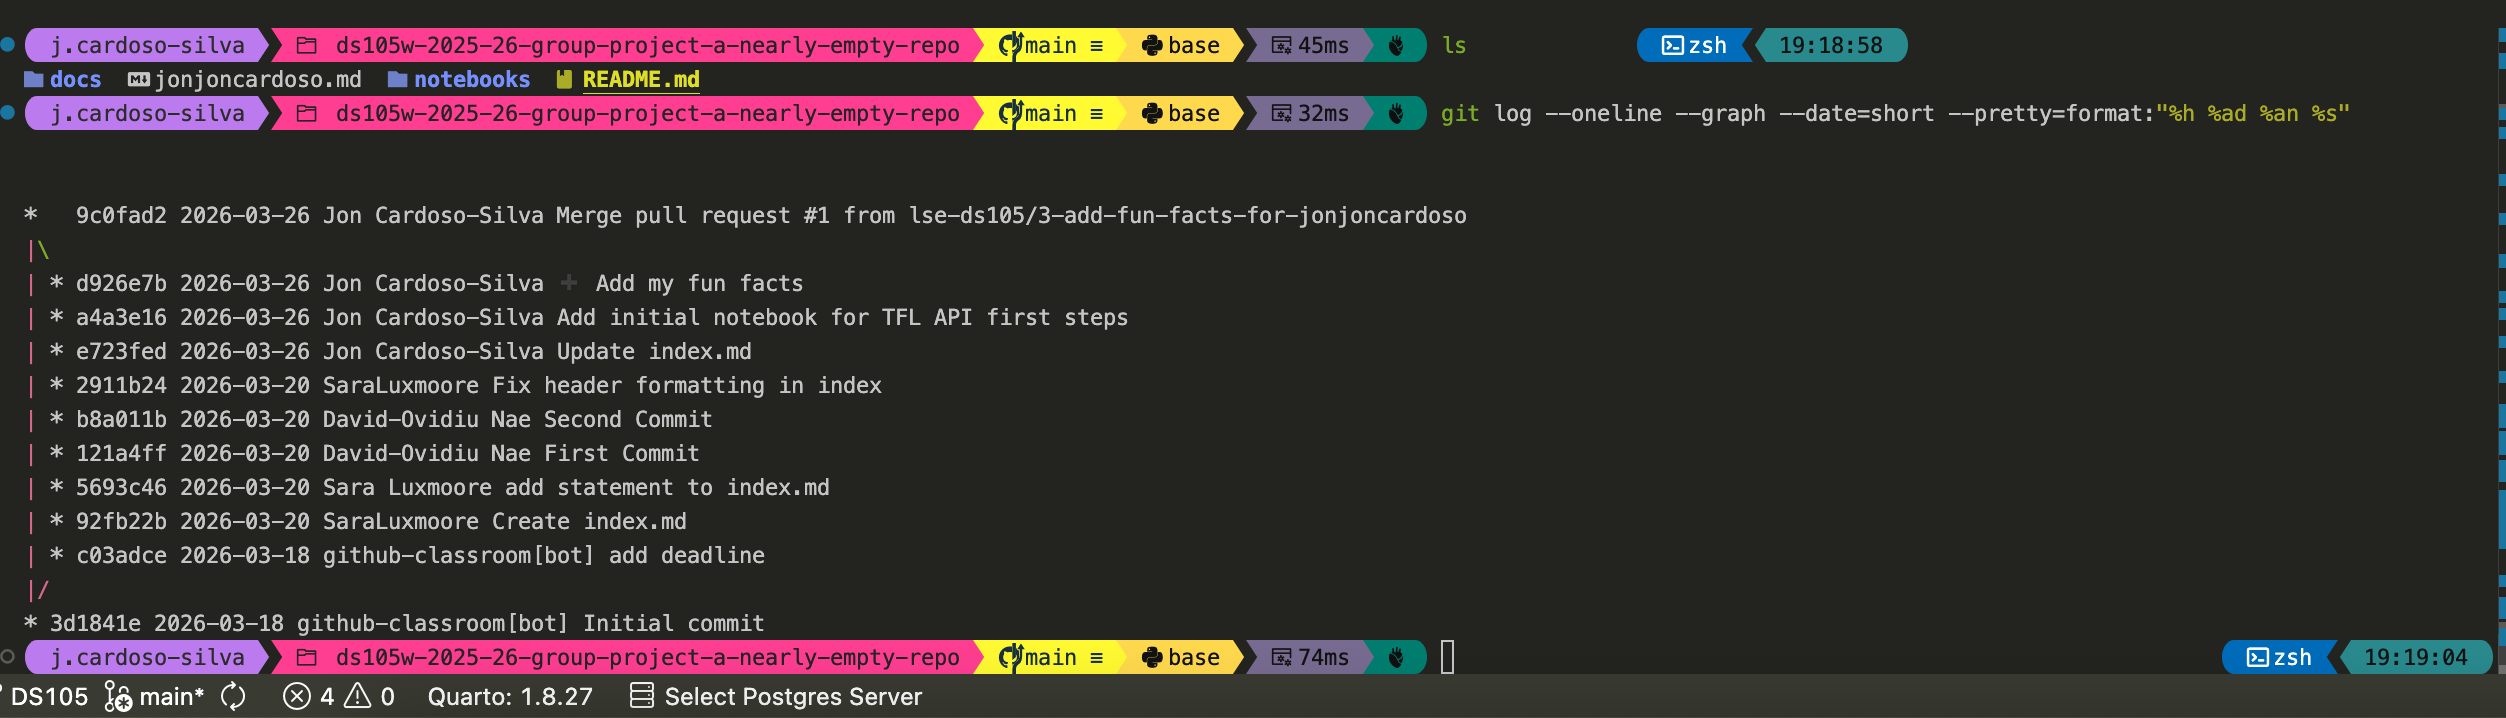
5 Review, merge, history
Maybe we need more factors?
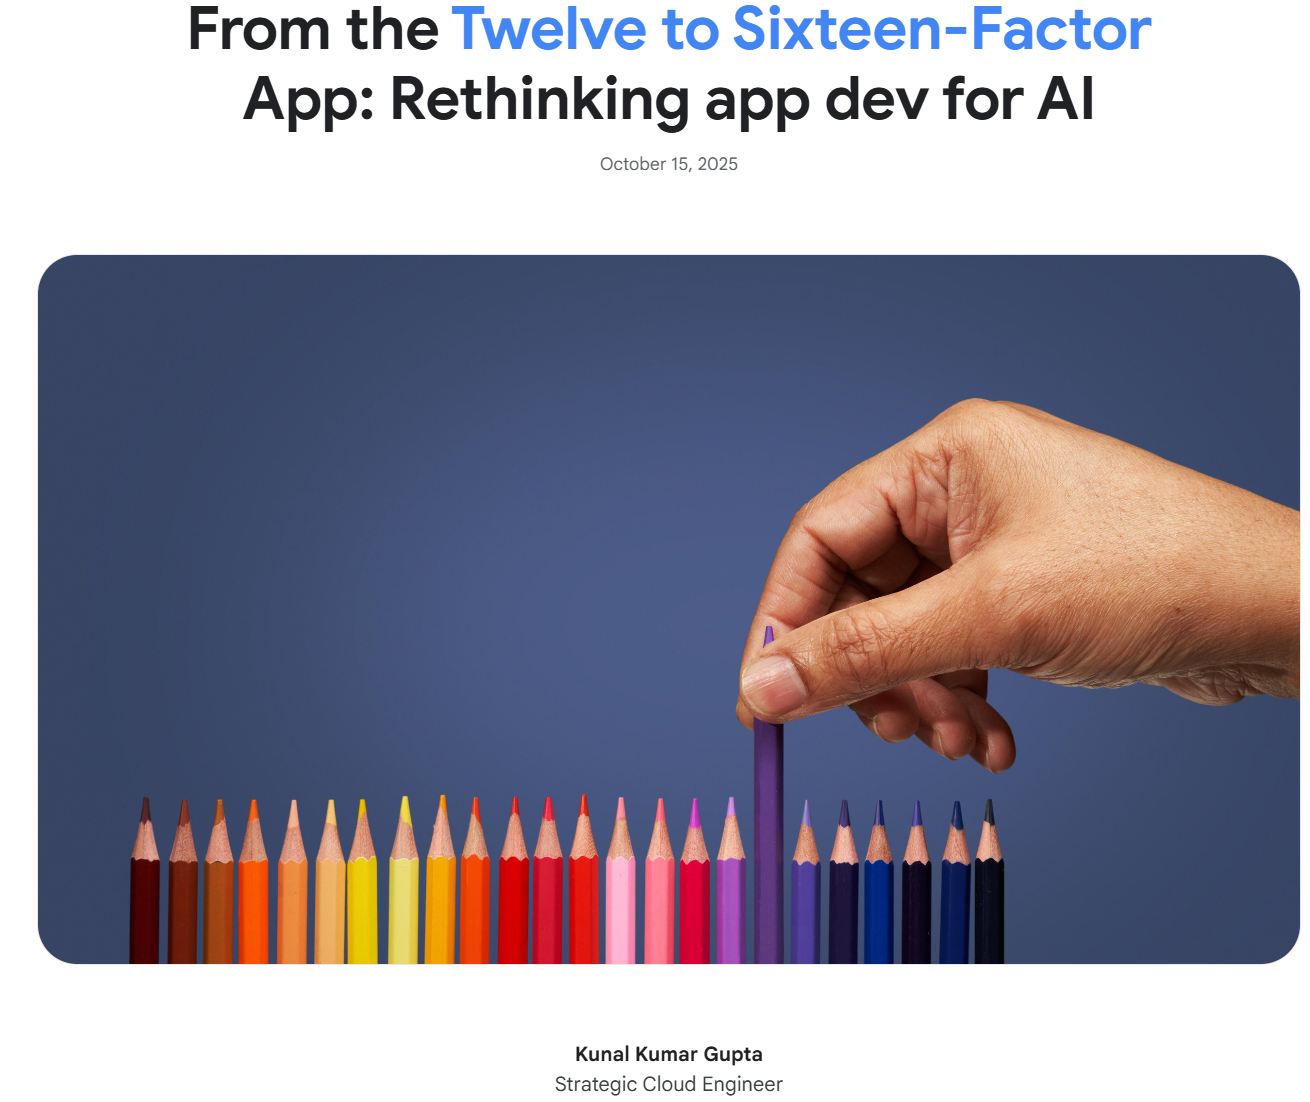
Google Cloud published an update to the 12-Factor framework in 2025, adding four new factors for AI-era applications: XIII: Prompts as code, XIV: State as a service, XV: Observability for non-determinism, and XVI: Trust & safety by design.
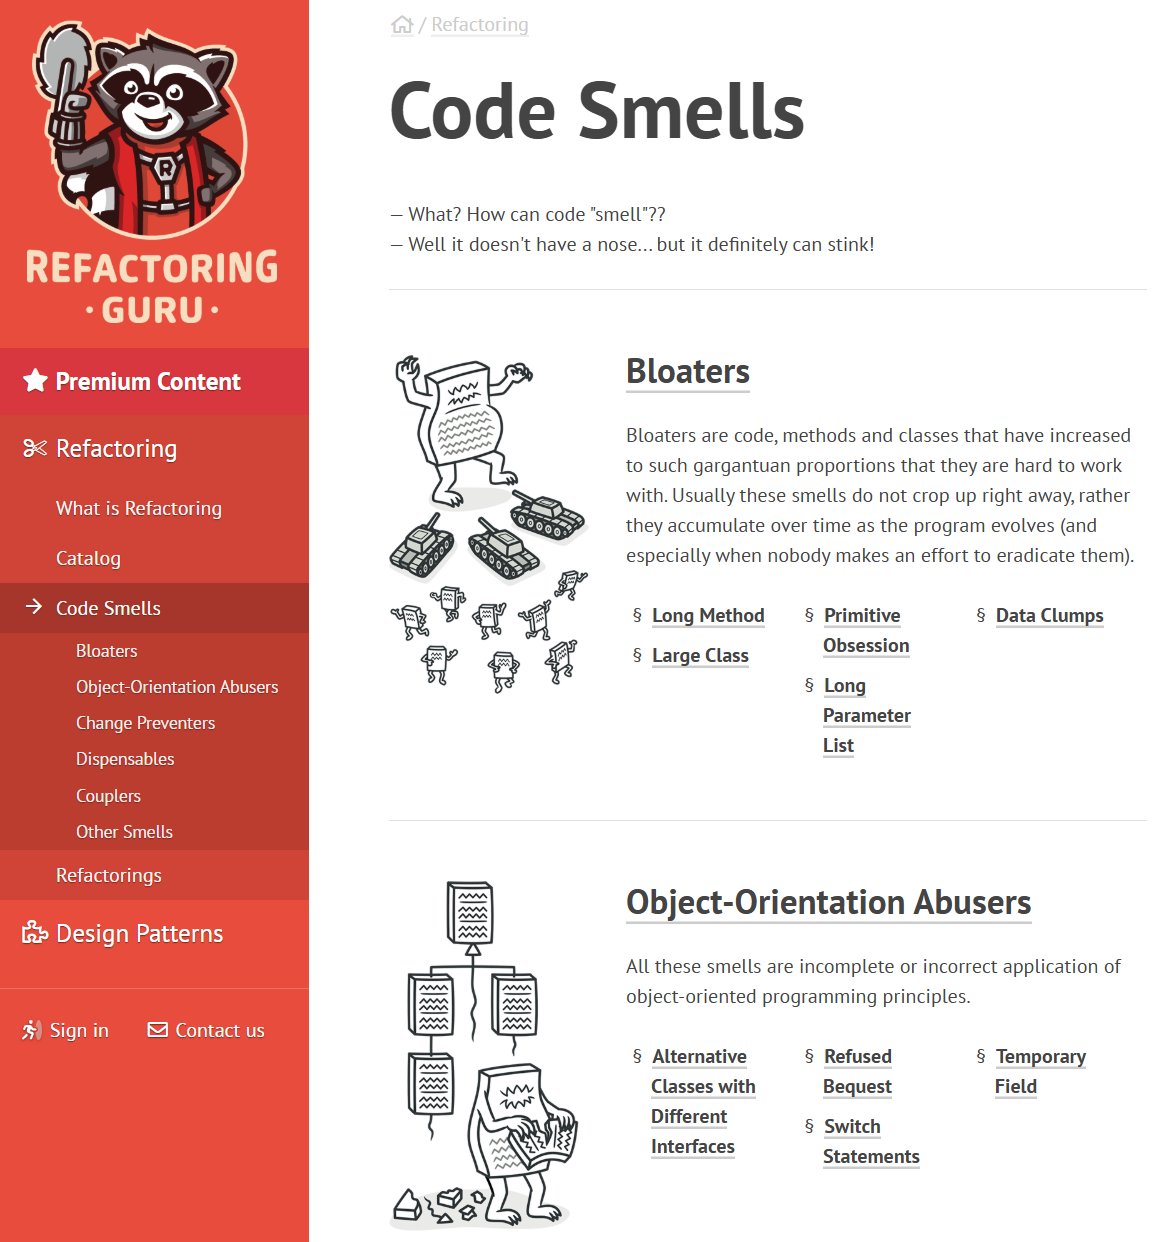
Code smells
A code smell is a surface-level pattern in code that suggests a deeper structural problem. The term comes from Martin Fowler’s Refactoring (1999). The website Refactoring Guru is an excellent visual catalogue.
Three smells that are especially common in data pipeline projects:
- Long Method: a function that does too many things. Hard to test, hard to reuse, hard to explain to a teammate.
- Data Clumps: the same group of variables appears together in multiple function signatures. They probably belong in a class or dataclass.
- Duplicate Code: the same logic copy-pasted into two places. When one copy is updated and the other is not, bugs appear.
If you notice a smell, and can’t fix it immediately, record it a GitHub Issue so it does not get lost. A smell that is documented is a conscious choice; a smell that is invisible is a trap.
VS Code & GitHub Copilot for group projects
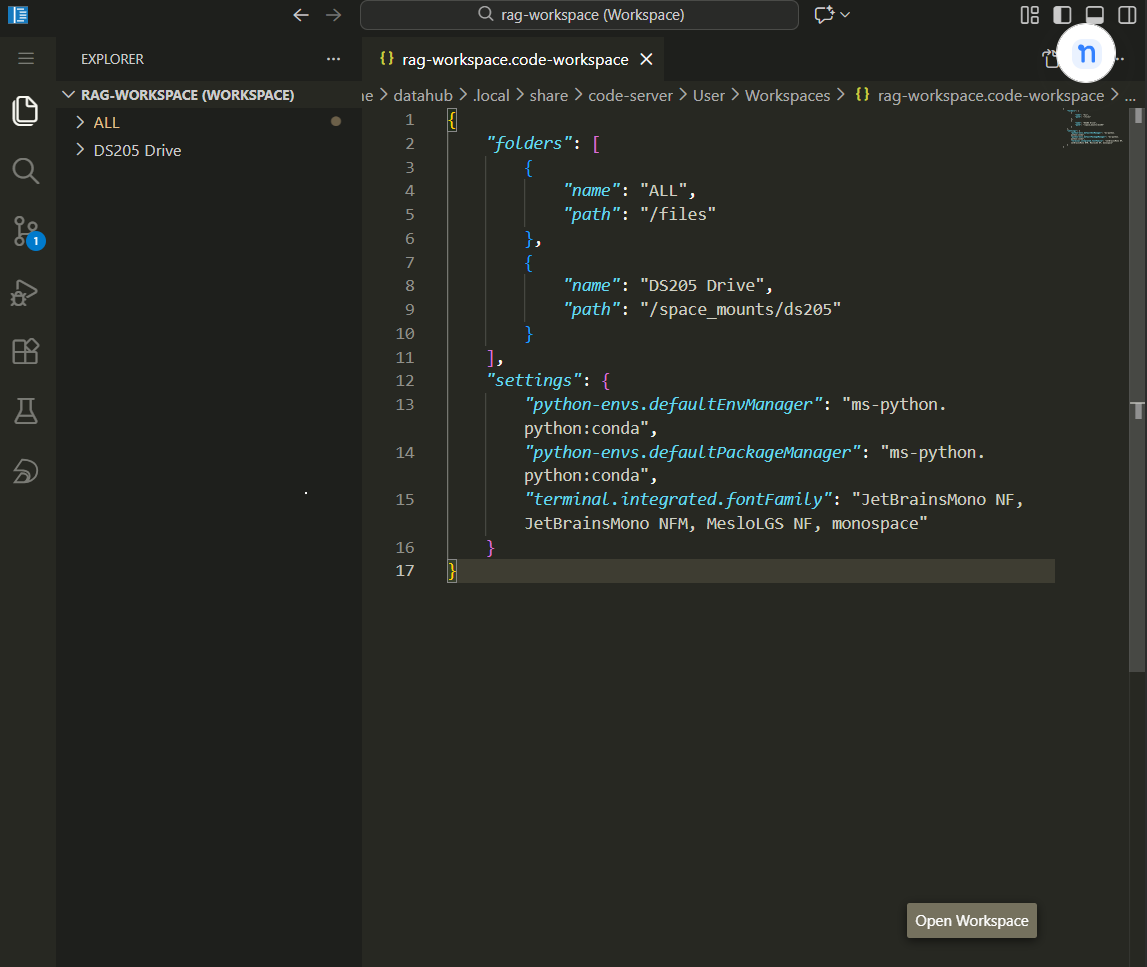
Workspaces
- There is a difference between “opening a folder” in VS Code and “opening a workspace.”
- A workspace (a
.code-workspacefile) lets you configure settings, extensions, and multi-root folders for the project. Copilot uses the workspace context to understand your project’s conventions.
Initialise GitHub Copilot

Copilot Instructions
- The
/initcommand in Copilot Chat reads the repository structure and generates a startercopilot-instructions.md. - Run this once when you set up the project, then curate the output so it accurately describes your conventions: which Python version, which linter, what the pipeline stages are, and what patterns to follow.
- This file goes in
.github/copilot-instructions.mdor asAGENTS.mdat the repository root.
Alternatively, use an interview workflow
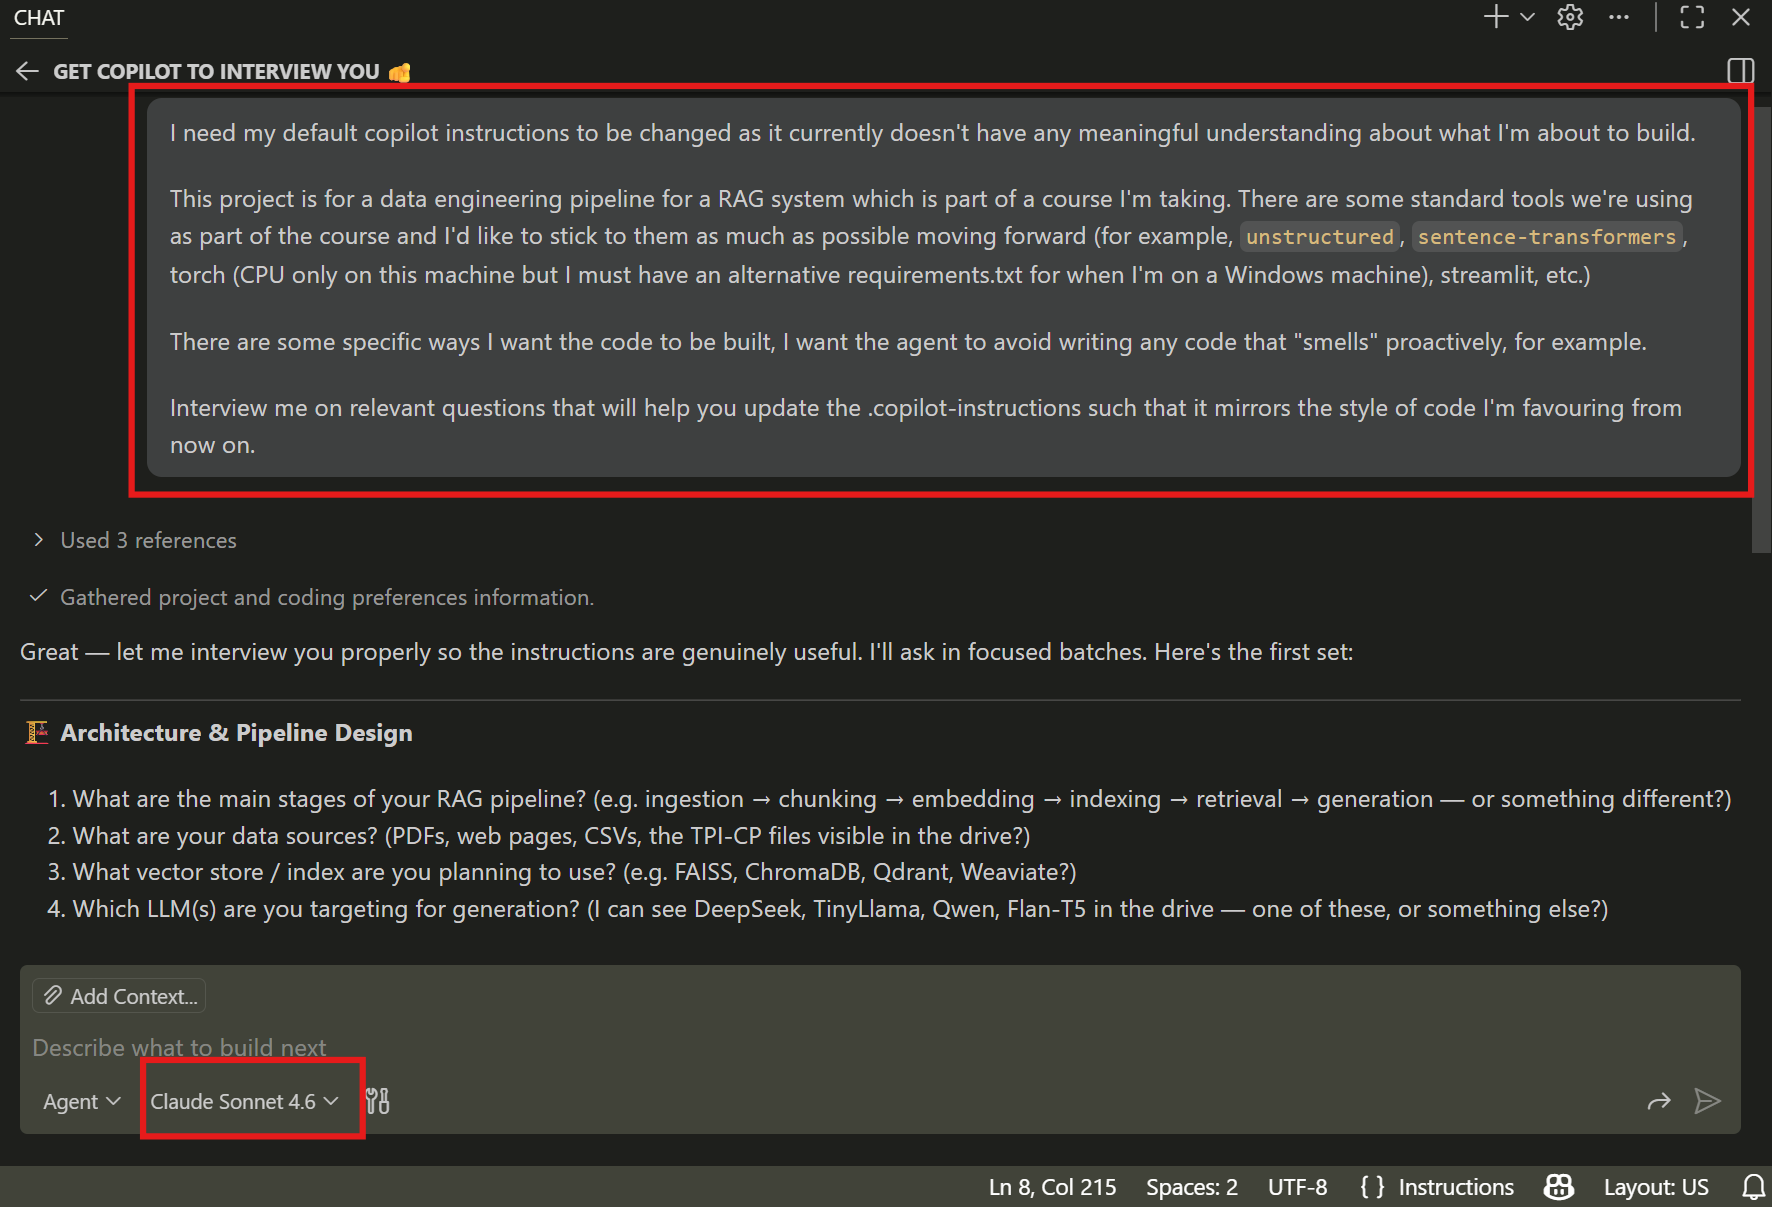
After running the
/initcommand, give Copilot a bit of context and then ask it to interview you. It will ask about your tool stack, style preferences, testing conventions, and what to avoid.Use a capable model (Claude Opus, Sonnet, GPT 5.4, etc.) to interview you.
If everyone shares the same file, and allow it to evolve over time, it becomes easier to maintain a consistent coding style across the team.
💡 If you’re using a different IDE, get it to point to the same file.
# Inside your CLAUDE.md file
Always read `.github/copilot-instructions.md` at
the start of each session.
Build Scaffolding
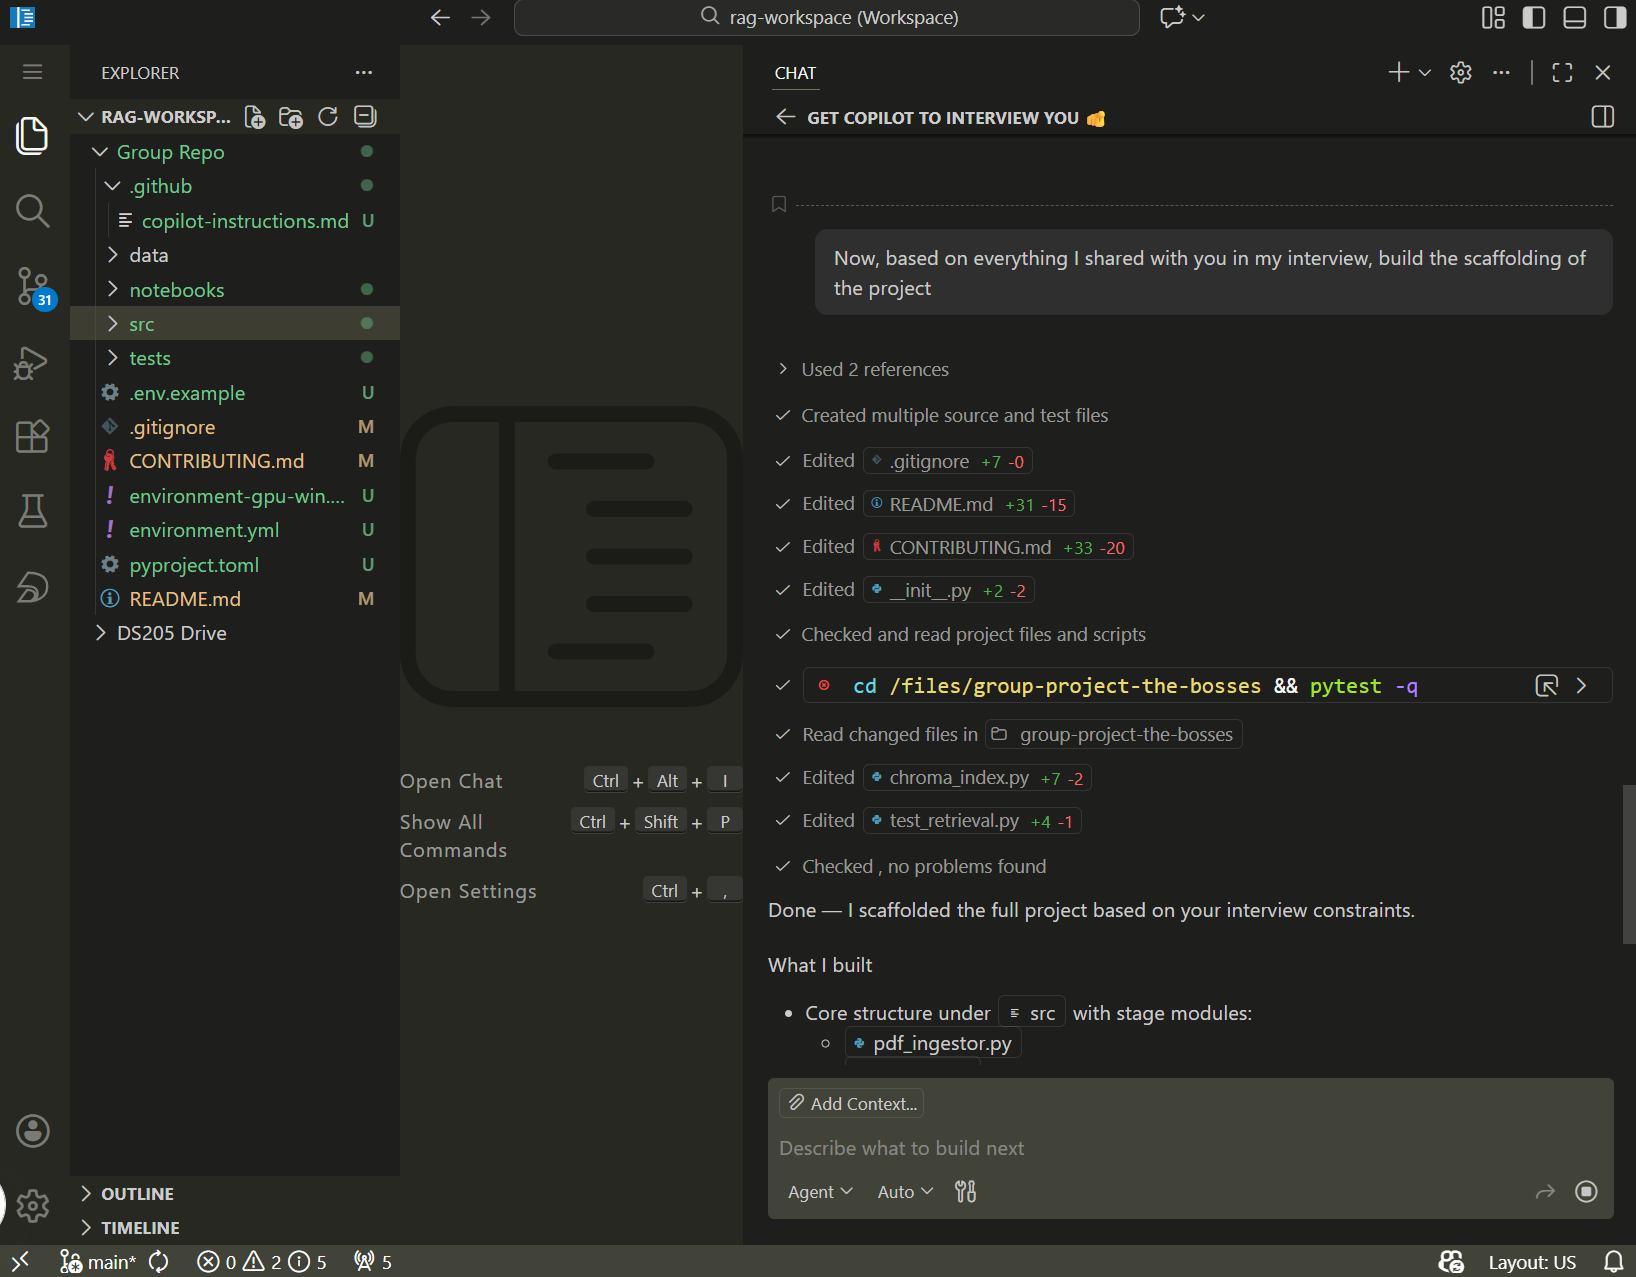
Plan, then execute
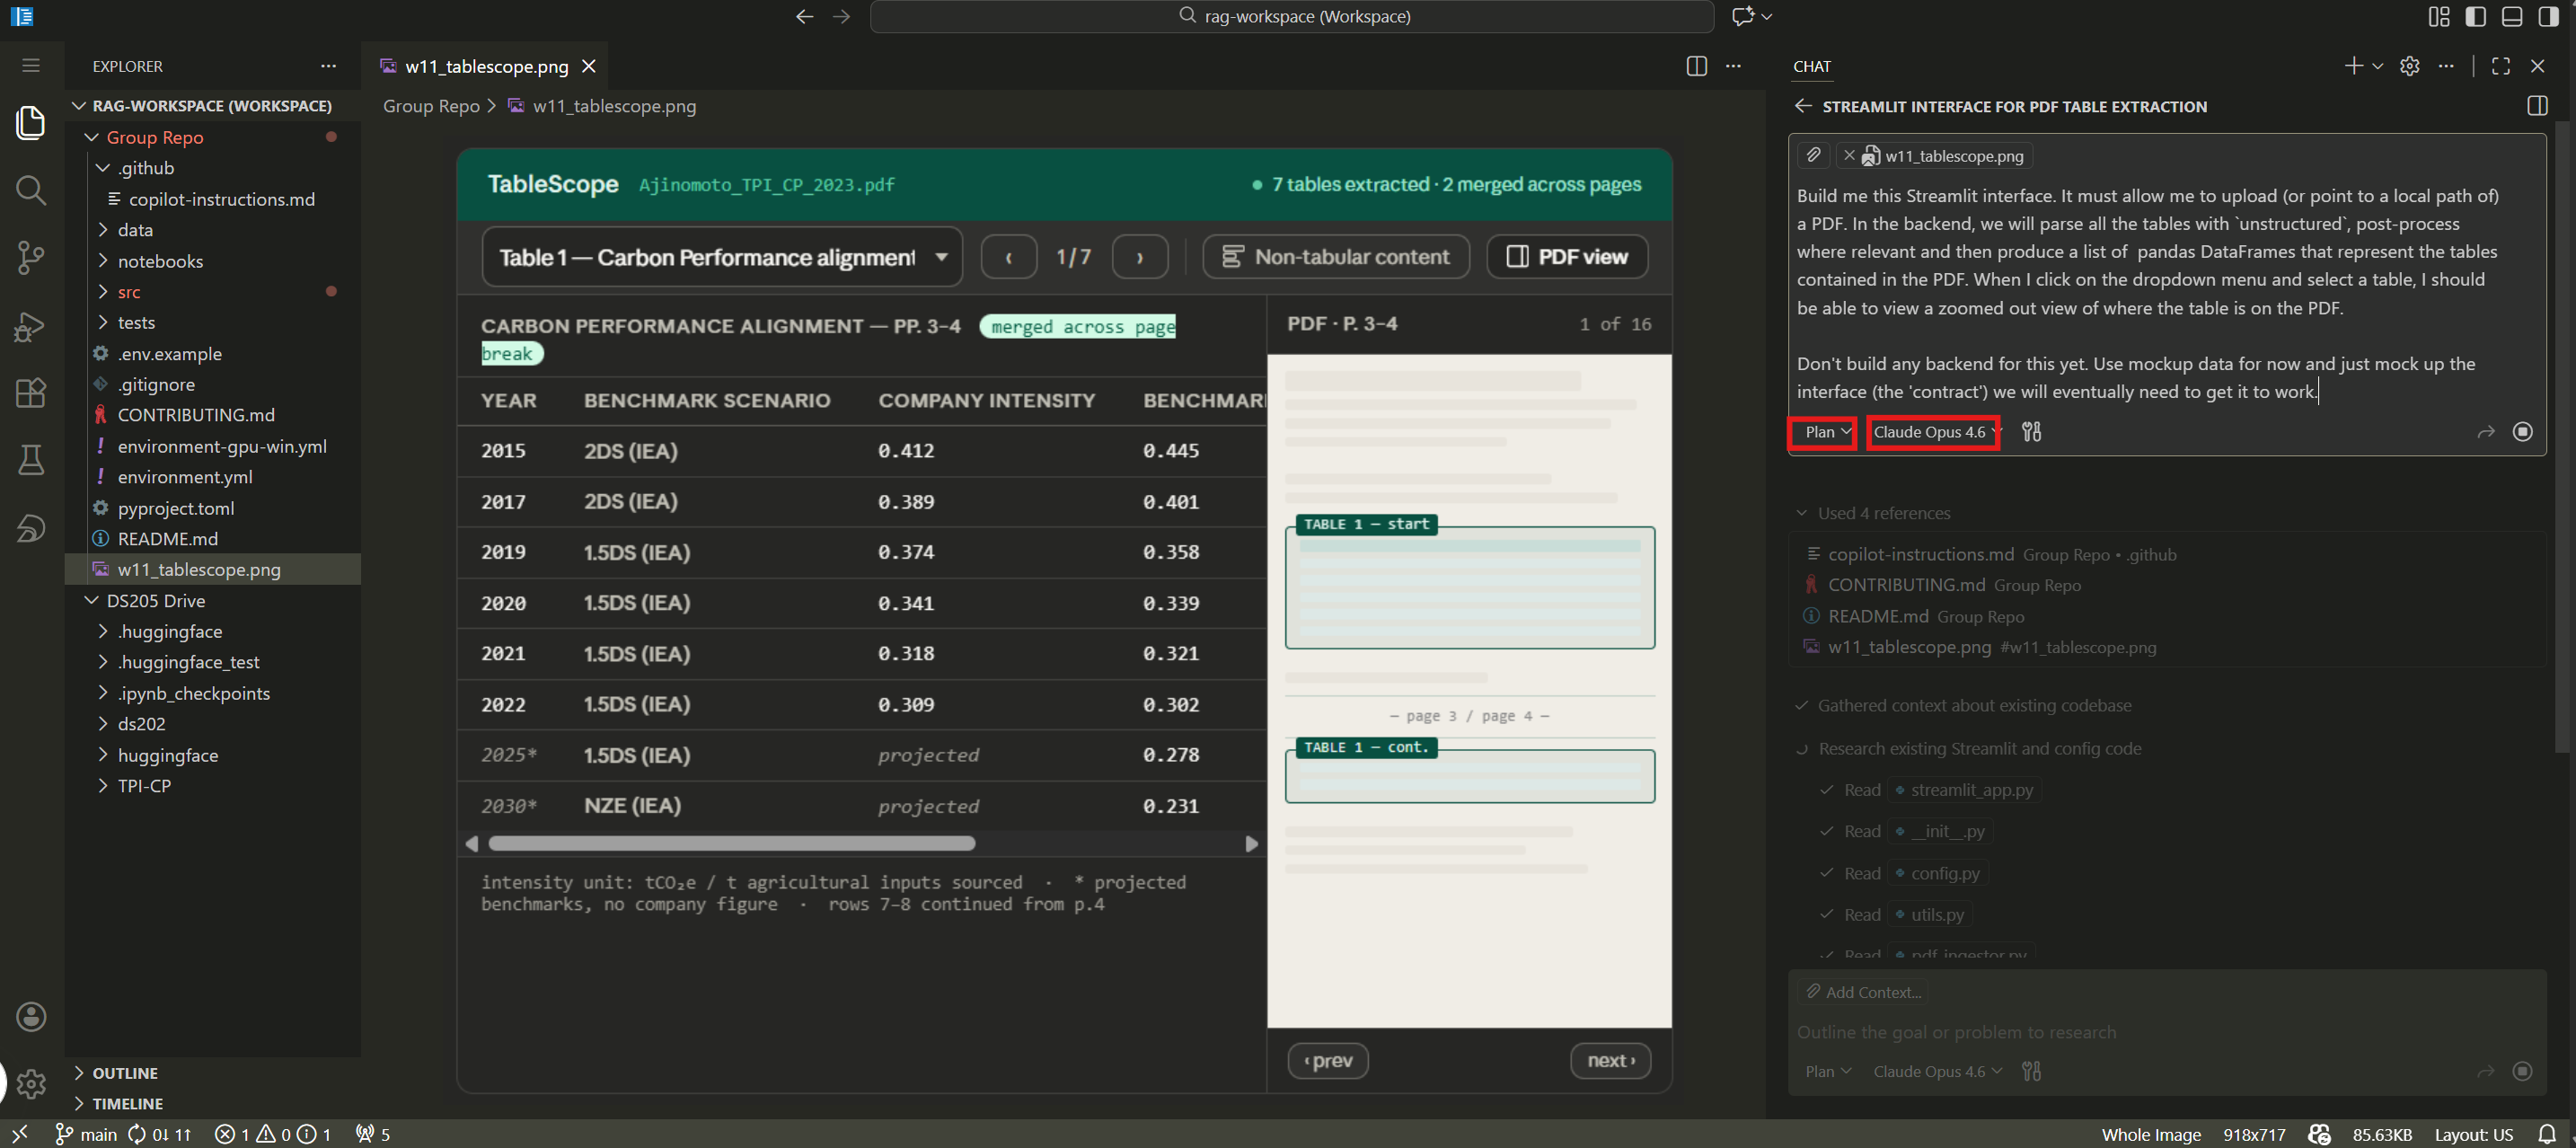
Say I want to build a Streamlit dashboard and I used Claude Web to brainstorm the interface and arrived at this:
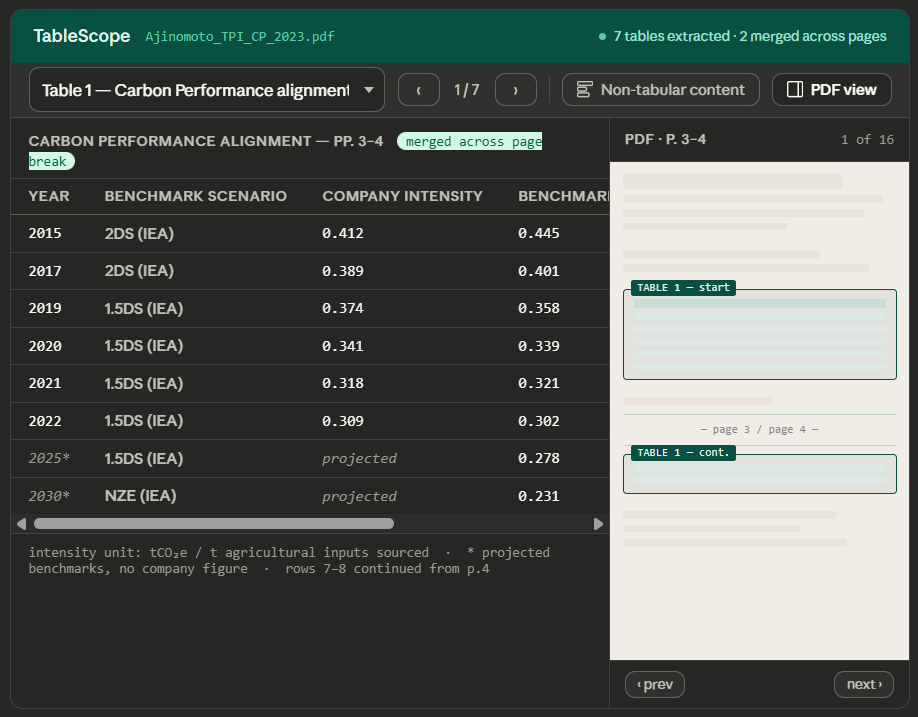
How would you use agentic AI coding to build it?
Plan first
Only then execute the plan
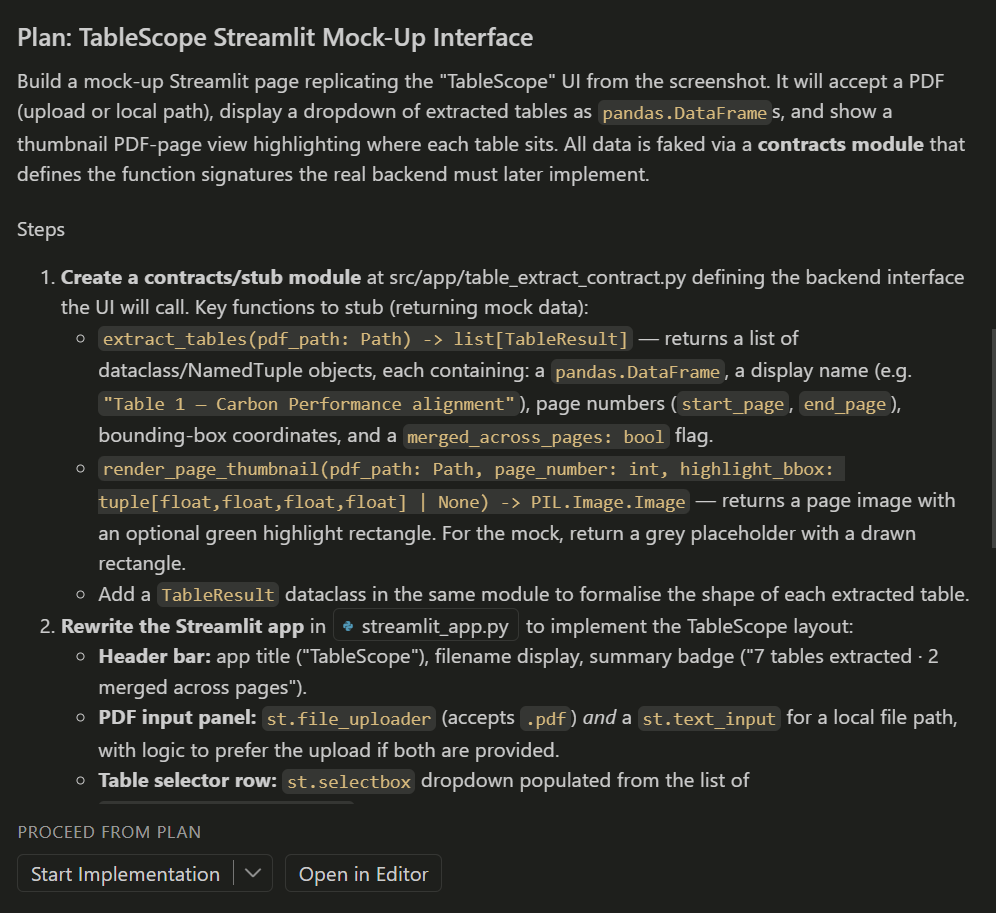
The pattern that works best:
- Describe the task to a capable model (Claude Opus, Sonnet, GPT 5.4, or similar) and ask it to produce a plan. Do not ask it to write code yet.
- Review the plan. Cut anything that is unnecessary or inconsistent with your project’s conventions.
- Ask a cheaper, faster model (Claude Haiku, GPT mini) to execute one step of the plan.
- Review the generated code. Remove anything you do not understand or do not need.
Writing code in 2026 is more like being a good manager than a solo software engineer. You delegate the tasks to the AI but you are still responsible for it to be “understanding” it correctly and producing the right code.
Coffee Break ☕
![]()
After the break:
- The six final project options
- How we will grade them
- Group formation and project bidding
- Live demo: GitHub Project Board workflow
Recommended Reading
Robust Python by Patrick Viafore (O’Reilly, 2021)
A practical guide to writing Python that other people can maintain. It covers typing, data classes, testing patterns, and architectural decisions that are directly relevant to what you will be building over the next eight weeks.
The book’s central argument is that code communicates intent to future readers, and the tools Python gives you (type hints, enums, dataclasses, protocols) are there to make that communication precise. If you read one programming book during this project, make it this one.